2003 Skybox LE
運動卡 · — · 2003 · 964 張卡
964 張卡
▾
- basketball-cards-2003-skybox-le118LeBron James#118未評級HK$23,535.87Grade 9—PSA 10—
 LeBron James[Gold Proof] #118未評級HK$10,489.15Grade 9—PSA 10—
 Chris Bosh#156 /99未評級HK$794.41Grade 9HK$227.51PSA 10—
- basketball-cards-2003-skybox-le122Carmelo Anthony[Gold Proof] #122未評級HK$627.62Grade 9—PSA 10—
- basketball-cards-2003-skybox-le122Carmelo Anthony[Photographer Proof] #122未評級HK$443.65Grade 9—PSA 10—
- basketball-cards-2003-skybox-le122Carmelo Anthony#122未評級HK$302.83Grade 9—PSA 10—
 Reggie Miller[Gold Proof] #26未評級HK$236.61Grade 9HK$725.22PSA 10HK$3,482.29
- basketball-cards-2003-skybox-le97Allen Iverson[Artist Proof] #97未評級HK$235.36Grade 9—PSA 10—
- basketball-cards-2003-skybox-le51Glenn Robinson[Photographer Proof] #51未評級HK$235.28Grade 9—PSA 10—
- basketball-cards-2003-skybox-le9Ray Allen[Artist Proof] #9未評級HK$203.98Grade 9—PSA 10—
- basketball-cards-2003-skybox-le97Allen Iverson[Gold Proof] #97未評級HK$127.02Grade 9—PSA 10—
- basketball-cards-2003-skybox-le62Manu Ginobili[Gold Proof] #62未評級HK$117.60Grade 9—PSA 10—
- basketball-cards-2003-skybox-le56Rasheed Wallace[Gold Proof] #56未評級HK$78.37Grade 9—PSA 10—
- basketball-cards-2003-skybox-le83Steve Francis[Artist Proof] #83未評級HK$78.37Grade 9—PSA 10—
- basketball-cards-2003-skybox-le154Nick Collison[Gold Proof] #154未評級HK$78.37Grade 9—PSA 10—
- basketball-cards-2003-skybox-le31Yao Ming[Jersey Proof] #31未評級HK$70.61Grade 9—PSA 10—
 Kobe Bryant#88未評級HK$66.29Grade 9HK$547.21PSA 10HK$1,137.57
- basketball-cards-2003-skybox-le9Ray Allen[Gold Proof] #9未評級HK$46.84Grade 9—PSA 10—
- basketball-cards-2003-skybox-le18Carmelo Anthony#18未評級HK$41.82Grade 9HK$121.84PSA 10HK$626.60
- basketball-cards-2003-skybox-le52Tim Thomas#52未評級HK$39.23Grade 9—PSA 10—
- basketball-cards-2003-skybox-le21Gilbert Arenas[Gold Proof] #21未評級HK$39.15Grade 9—PSA 10—
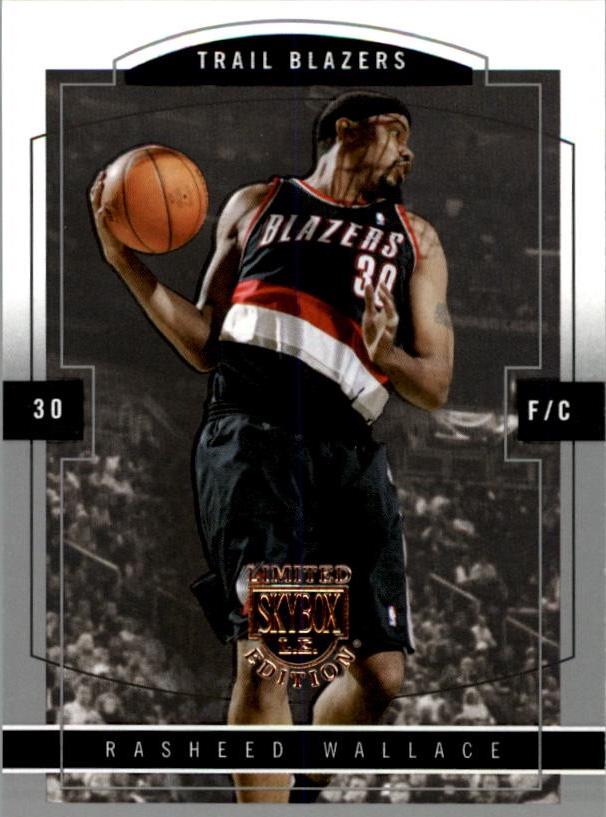 Rasheed Wallace#56 /399未評級HK$35.30Grade 9HK$174.71PSA 10HK$718.24
- basketball-cards-2003-skybox-le109Jalen Rose[Gold Proof] #109未評級HK$31.38Grade 9—PSA 10—
- basketball-cards-2003-skybox-le105Hedo Turkoglu[Gold Proof] #105未評級HK$31.30Grade 9—PSA 10—
- basketball-cards-2003-skybox-le143Slavko Vranes#143未評級HK$31.07Grade 9—PSA 10—
- basketball-cards-2003-skybox-le77Steve Nash#77未評級HK$25.58Grade 9—PSA 10—
- basketball-cards-2003-skybox-le3Paul Pierce[Gold Proof] #3未評級HK$25.50Grade 9—PSA 10—
- basketball-cards-2003-skybox-le9Ray Allen#9未評級HK$25.18Grade 9—PSA 10—
- basketball-cards-2003-skybox-le37Michael Redd[Gold Proof] #37未評級HK$23.69Grade 9—PSA 10—
- basketball-cards-2003-skybox-le41Wally Szczerbiak#41未評級HK$23.54Grade 9—PSA 10—
- basketball-cards-2003-skybox-le102Anfernee Hardaway#102未評級HK$21.18Grade 9—PSA 10—
- basketball-cards-2003-skybox-le61Andrei Kirilenko#61未評級HK$20.63Grade 9—PSA 10—
- basketball-cards-2003-skybox-le31Yao Ming#31未評級HK$18.36Grade 9—PSA 10HK$235.28
- basketball-cards-2003-skybox-le8Darius Miles[Gold Proof] #8未評級HK$17.65Grade 9—PSA 10—
- basketball-cards-2003-skybox-le35Eddie Jones[Gold Proof] #35未評級HK$17.65Grade 9—PSA 10—
- basketball-cards-2003-skybox-le71John Salmons[Gold Proof] #71未評級HK$17.65Grade 9—PSA 10—
 Allen Iverson#97未評級HK$17.65Grade 9—PSA 10—
- basketball-cards-2003-skybox-le102Anfernee Hardaway[Gold Proof] #102未評級HK$17.65Grade 9—PSA 10—
- basketball-cards-2003-skybox-le65Allan Houston#65未評級HK$17.57Grade 9—PSA 10—
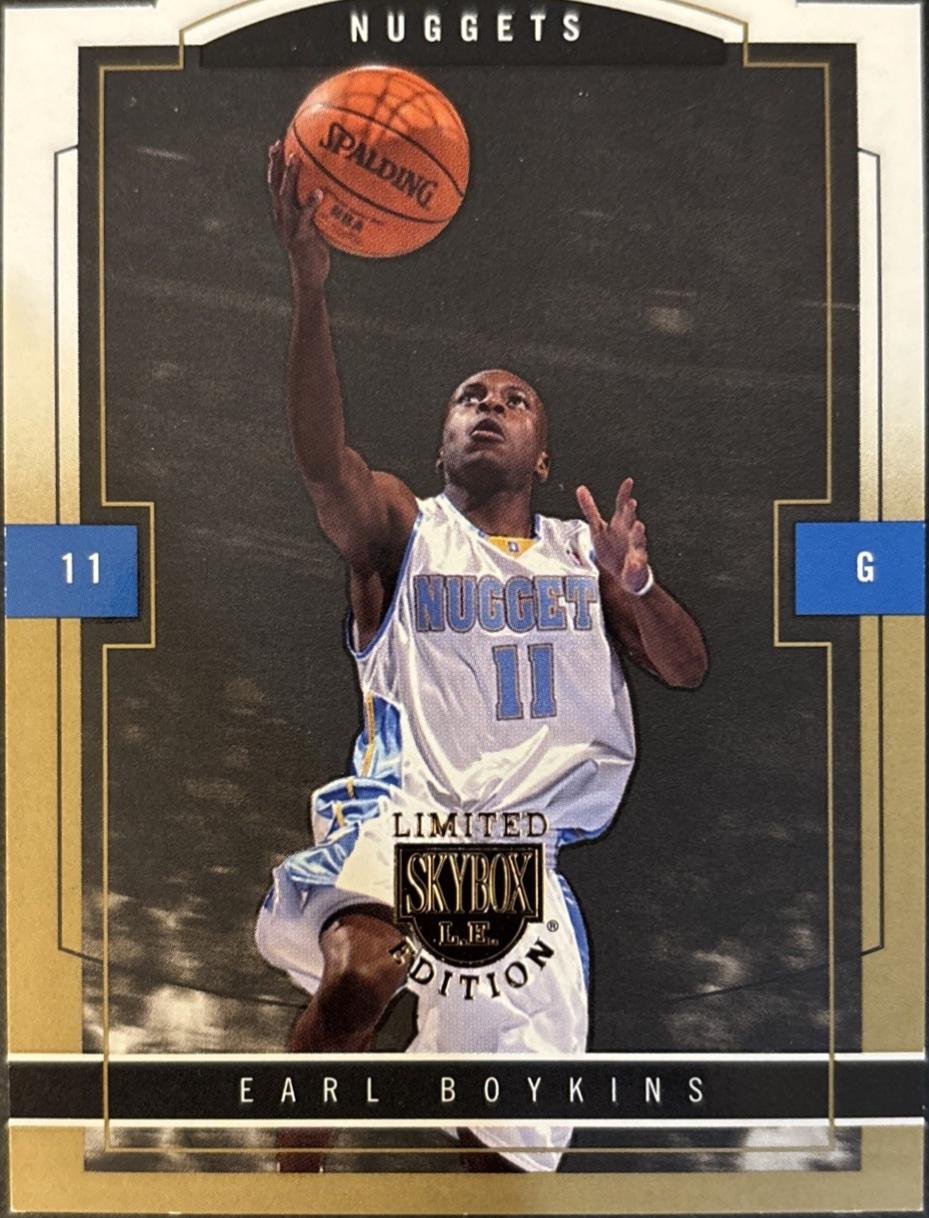 Earl Boykins[Gold Proof] #80未評級HK$16.16Grade 9HK$120.97PSA 10HK$448.83
 Shaquille O'Neal#44未評級HK$15.61Grade 9HK$776.68PSA 10HK$933.59
- basketball-cards-2003-skybox-le46Pau Gasol#46未評級HK$15.61Grade 9—PSA 10—
- basketball-cards-2003-skybox-le83Steve Francis#83未評級HK$15.61Grade 9—PSA 10—
- basketball-cards-2003-skybox-le98Amare Stoudemire#98未評級HK$15.61Grade 9—PSA 10—
- basketball-cards-2003-skybox-le32Tyson Chandler#32未評級HK$15.38Grade 9—PSA 10—
- basketball-cards-2003-skybox-le24Tayshaun Prince#24未評級HK$14.67Grade 9—PSA 10—
- basketball-cards-2003-skybox-le57Troy Hudson#57未評級HK$14.51Grade 9—PSA 10—
- basketball-cards-2003-skybox-le115Kendrick Perkins#115未評級HK$14.44Grade 9—PSA 10—
- basketball-cards-2003-skybox-le157Aleksandar Pavlovic#157未評級HK$14.44Grade 9—PSA 10—
- basketball-cards-2003-skybox-le101Bobby Jackson#101未評級HK$13.73Grade 9—PSA 10—
 Vince Carter#40未評級HK$13.02Grade 9HK$117.60PSA 10HK$203.98
- basketball-cards-2003-skybox-le51Glenn Robinson#51未評級HK$12.94Grade 9—PSA 10—
 Kevin Garnett#54未評級HK$12.94Grade 9—PSA 10—
- basketball-cards-2003-skybox-le75Keon Clark#75未評級HK$12.55Grade 9—PSA 10—
- basketball-cards-2003-skybox-le85Ron Artest#85未評級HK$12.55Grade 9—PSA 10—
- basketball-cards-2003-skybox-le95Troy Murphy#95未評級HK$12.55Grade 9—PSA 10—
- basketball-cards-2003-skybox-le104Shareef Abdur-Rahim#104未評級HK$12.55Grade 9—PSA 10—
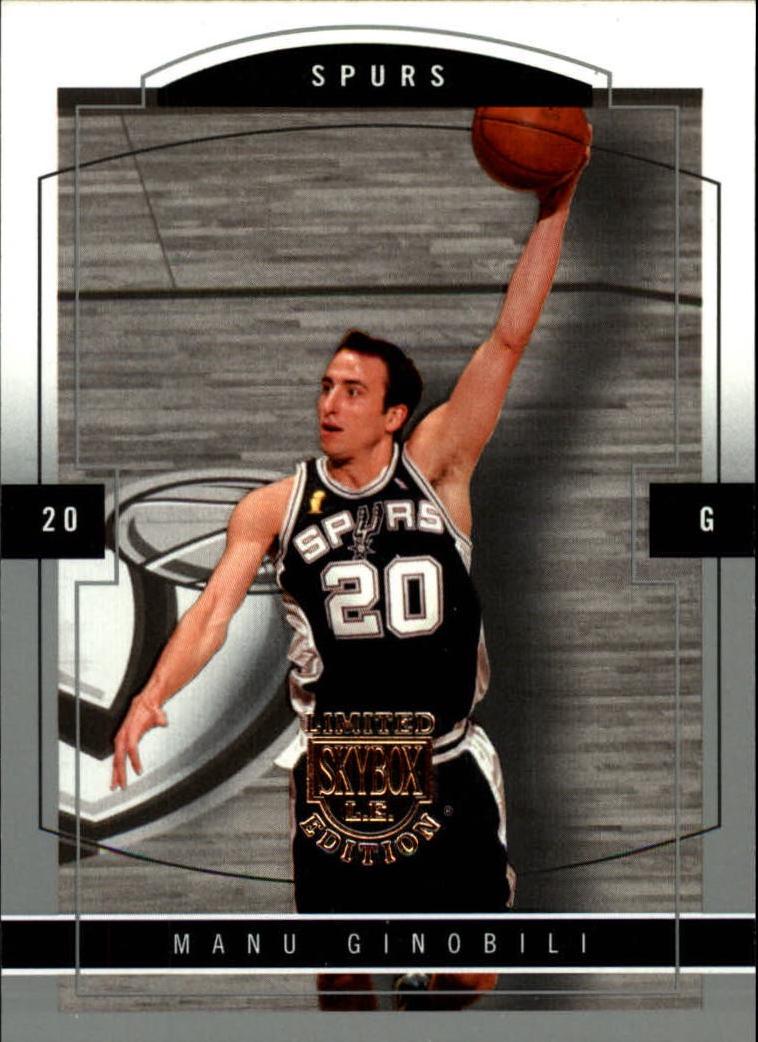 Manu Ginobili#62未評級HK$12.00Grade 9HK$58.84PSA 10HK$398.62
- basketball-cards-2003-skybox-le73Scottie Pippen#73未評級HK$12.00Grade 9HK$180.76PSA 10—
- basketball-cards-2003-skybox-le110Antonio Davis#110未評級HK$11.77Grade 9—PSA 10—
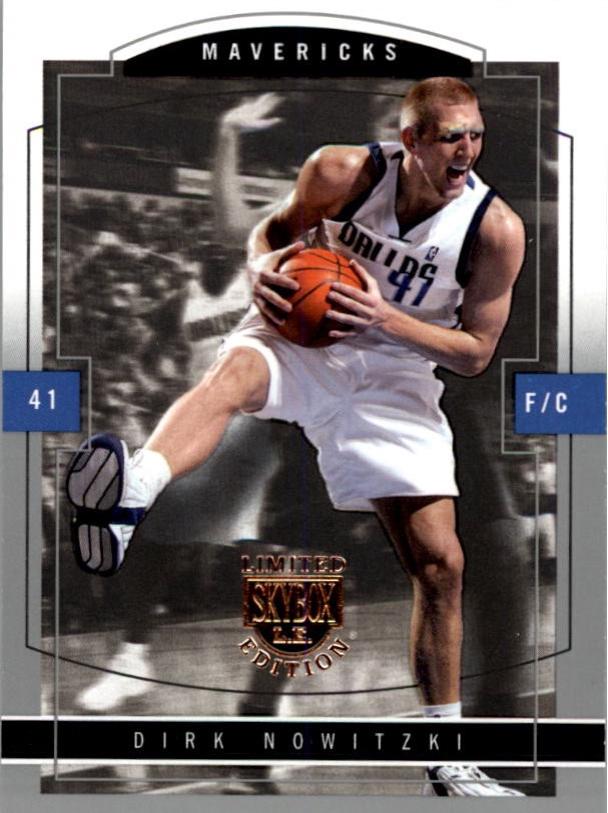 Dirk Nowitzki#12未評級HK$10.98Grade 9HK$108.50PSA 10HK$386.30
 Chris Webber#25未評級HK$10.51Grade 9—PSA 10—
- basketball-cards-2003-skybox-le21Gilbert Arenas#21未評級HK$9.81Grade 9—PSA 10—
- basketball-cards-2003-skybox-le31Yao Ming[Gold Proof] #31未評級HK$9.81Grade 9—PSA 10—
- basketball-cards-2003-skybox-le47Dikembe Mutombo#47未評級HK$9.57Grade 9—PSA 10—
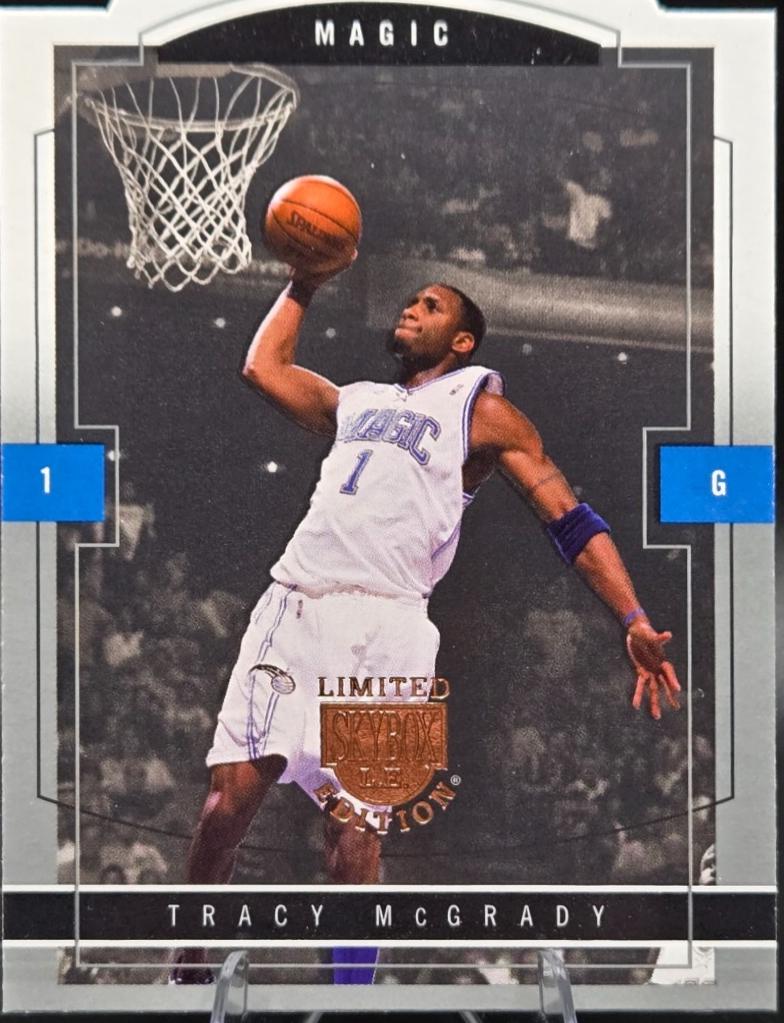 Tracy McGrady#67未評級HK$9.34Grade 9—PSA 10—
 Jason Williams#33未評級HK$8.79Grade 9—PSA 10—
- basketball-cards-2003-skybox-le68Matt Harpring#68未評級HK$8.55Grade 9—PSA 10—
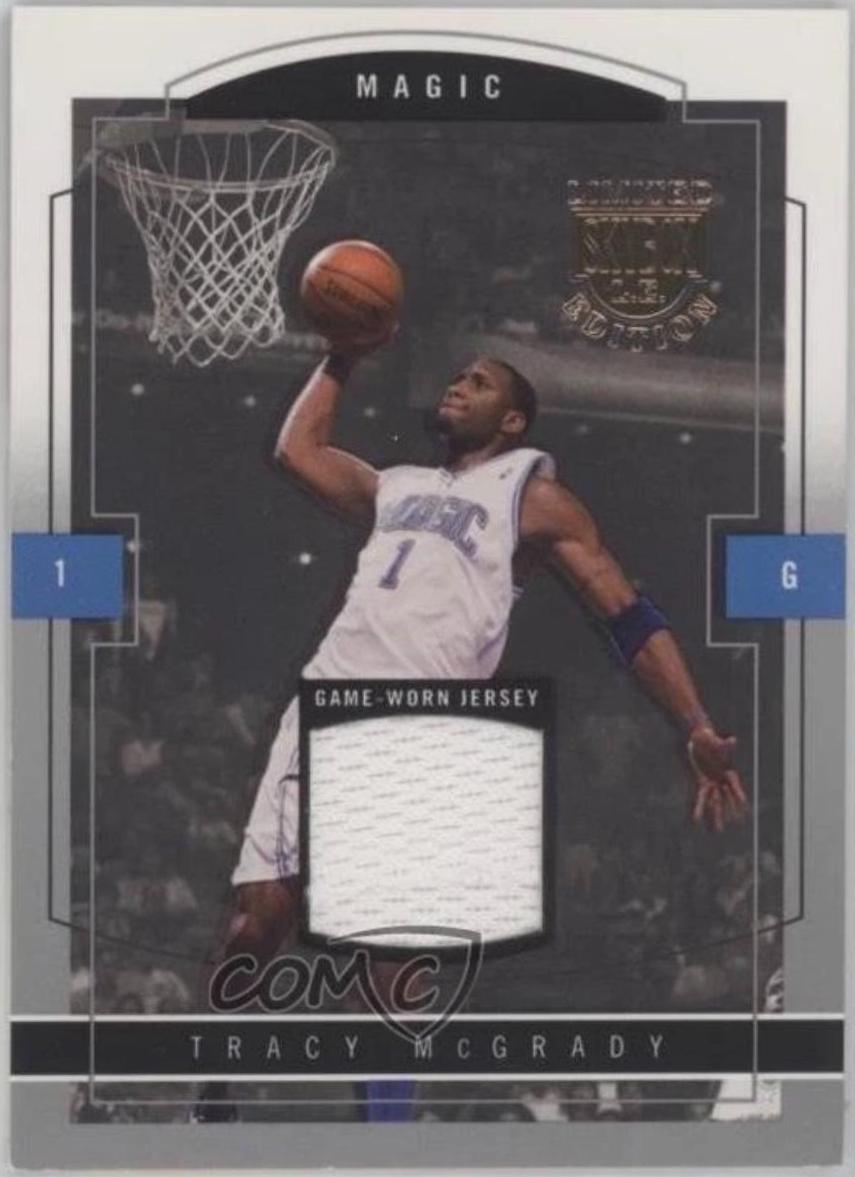 Tracy McGrady[Jersey Edition] #67 /399未評級HK$8.39Grade 9—PSA 10—
- basketball-cards-2003-skybox-le30Karl Malone#30未評級HK$8.24Grade 9—PSA 10—
- basketball-cards-2003-skybox-le3Paul Pierce#3未評級HK$7.77Grade 9—PSA 10—
- basketball-cards-2003-skybox-le10Sam Cassell#10未評級HK$7.77Grade 9—PSA 10—
- basketball-cards-2003-skybox-le14Tim Duncan#14未評級HK$7.77Grade 9—PSA 10—
- basketball-cards-2003-skybox-le15Gary Payton#15未評級HK$7.77Grade 9—PSA 10—
 Ben Wallace#16未評級HK$7.77Grade 9HK$99.71PSA 10HK$342.05
- basketball-cards-2003-skybox-le17Michael Finley#17未評級HK$7.77Grade 9—PSA 10—
- basketball-cards-2003-skybox-le49Drew Gooden#49未評級HK$7.77Grade 9—PSA 10—
- basketball-cards-2003-skybox-le53Shawn Marion#53未評級HK$7.77Grade 9—PSA 10—
- basketball-cards-2003-skybox-le55Stephon Marbury#55未評級HK$7.77Grade 9—PSA 10—
- basketball-cards-2003-skybox-le60Tony Parker#60未評級HK$7.77Grade 9—PSA 10—
- basketball-cards-2003-skybox-le79Keith Van Horn#79未評級HK$7.77Grade 9—PSA 10—
- basketball-cards-2003-skybox-le92Latrell Sprewell#92未評級HK$7.77Grade 9—PSA 10—
- basketball-cards-2003-skybox-le155Luke Ridnour#155未評級HK$7.77Grade 9—PSA 10—
 Zach Randolph#13未評級HK$5.33Grade 9—PSA 10—
- basketball-cards-2003-skybox-le28Quentin Richardson#28未評級HK$2.12Grade 9—PSA 10—
- basketball-cards-2003-skybox-le5Ricky Davis#5未評級HK$1.96Grade 9—PSA 10—
- basketball-cards-2003-skybox-le18David Wesley#18未評級HK$1.96Grade 9—PSA 10—
- basketball-cards-2003-skybox-le20Marcus Camby#20未評級HK$1.96Grade 9—PSA 10—
- basketball-cards-2003-skybox-le27Chauncey Billups#27未評級HK$1.96Grade 9—PSA 10—
- basketball-cards-2003-skybox-le89Mike Miller#89未評級HK$1.96Grade 9—PSA 10—
- basketball-cards-2003-skybox-le84Jermaine O'Neal#84未評級HK$0.08Grade 9—PSA 10—
- basketball-cards-2003-skybox-le1Jason Terry#1未評級—Grade 9—PSA 10—
- basketball-cards-2003-skybox-le1Jason Terry[Gold Proof] #1未評級—Grade 9—PSA 10—
- basketball-cards-2003-skybox-le1Jason Terry[Executive Proof] #1未評級—Grade 9—PSA 10—
- basketball-cards-2003-skybox-le1Jason Terry[Artist Proof] #1未評級—Grade 9—PSA 10—
- basketball-cards-2003-skybox-le1Jason Terry[Jersey Proof] #1未評級—Grade 9—PSA 10—
- basketball-cards-2003-skybox-le1Jason Terry[Photographer Proof] #1未評級—Grade 9—PSA 10—
- basketball-cards-2003-skybox-le2Antoine Walker[Photographer Proof] #2未評級—Grade 9—PSA 10—
- basketball-cards-2003-skybox-le2Antoine Walker[Artist Proof] #2未評級—Grade 9—PSA 10—
- basketball-cards-2003-skybox-le2Antoine Walker[Executive Proof] #2未評級—Grade 9—PSA 10—
- basketball-cards-2003-skybox-le2Antoine Walker[Gold Proof] #2未評級—Grade 9—PSA 10—
- basketball-cards-2003-skybox-le2Antoine Walker#2未評級—Grade 9—PSA 10—
- basketball-cards-2003-skybox-le2Antoine Walker[Jersey Proof] #2未評級—Grade 9—PSA 10—
- basketball-cards-2003-skybox-le3Paul Pierce[Executive Proof] #3未評級—Grade 9—PSA 10—
- basketball-cards-2003-skybox-le3Paul Pierce[Jersey Proof] #3未評級—Grade 9—PSA 10—
- basketball-cards-2003-skybox-le3Paul Pierce[Artist Proof] #3未評級—Grade 9—PSA 10—
- basketball-cards-2003-skybox-le3Paul Pierce[Photographer Proof] #3未評級—Grade 9—PSA 10—
- basketball-cards-2003-skybox-le4Eddy Curry[Executive Proof] #4未評級—Grade 9—PSA 10—
- basketball-cards-2003-skybox-le4Eddy Curry[Artist Proof] #4未評級—Grade 9—PSA 10—
- basketball-cards-2003-skybox-le4Eddy Curry#4未評級—Grade 9—PSA 10—
- basketball-cards-2003-skybox-le4Eddy Curry[Photographer Proof] #4未評級—Grade 9—PSA 10—
- basketball-cards-2003-skybox-le4Eddy Curry[Jersey Proof] #4未評級—Grade 9—PSA 10—
- basketball-cards-2003-skybox-le4Eddy Curry[Gold Proof] #4未評級—Grade 9—PSA 10—
- basketball-cards-2003-skybox-le5Ricky Davis[Executive Proof] #5未評級—Grade 9—PSA 10—
- basketball-cards-2003-skybox-le5Ricky Davis[Jersey Proof] #5未評級—Grade 9—PSA 10—
- basketball-cards-2003-skybox-le5Ricky Davis[Photographer Proof] #5未評級—Grade 9—PSA 10—
- basketball-cards-2003-skybox-le5Ricky Davis[Gold Proof] #5未評級—Grade 9—PSA 10—
- basketball-cards-2003-skybox-le5Ricky Davis[Artist Proof] #5未評級—Grade 9—PSA 10—
- basketball-cards-2003-skybox-le6Jamal Crawford#6未評級—Grade 9—PSA 10—
- basketball-cards-2003-skybox-le6Jamal Crawford[Gold Proof] #6未評級—Grade 9—PSA 10—
- basketball-cards-2003-skybox-le6Jamal Crawford[Executive Proof] #6未評級—Grade 9—PSA 10—
- basketball-cards-2003-skybox-le6Jamal Crawford[Artist Proof] #6未評級—Grade 9—PSA 10—
- basketball-cards-2003-skybox-le6Jamal Crawford[Jersey Proof] #6未評級—Grade 9—PSA 10—
- basketball-cards-2003-skybox-le6Jamal Crawford[Photographer Proof] #6未評級—Grade 9—PSA 10—
- basketball-cards-2003-skybox-le7Raef LaFrentz[Artist Proof] #7未評級—Grade 9—PSA 10—
- basketball-cards-2003-skybox-le7Raef LaFrentz#7未評級—Grade 9—PSA 10—
- basketball-cards-2003-skybox-le7Raef LaFrentz[Photographer Proof] #7未評級—Grade 9—PSA 10—
- basketball-cards-2003-skybox-le7Raef LaFrentz[Jersey Proof] #7未評級—Grade 9—PSA 10—
- basketball-cards-2003-skybox-le7Raef LaFrentz[Gold Proof] #7未評級—Grade 9—PSA 10—
- basketball-cards-2003-skybox-le7Raef LaFrentz[Executive Proof] #7未評級—Grade 9—PSA 10—
- basketball-cards-2003-skybox-le8Darius Miles#8未評級—Grade 9—PSA 10—
- basketball-cards-2003-skybox-le8Darius Miles[Photographer Proof] #8未評級—Grade 9—PSA 10—
- basketball-cards-2003-skybox-le8Darius Miles[Artist Proof] #8未評級—Grade 9—PSA 10—
- basketball-cards-2003-skybox-le8Darius Miles[Jersey Proof] #8未評級—Grade 9—PSA 10—
- basketball-cards-2003-skybox-le8Darius Miles[Executive Proof] #8未評級—Grade 9—PSA 10—
- basketball-cards-2003-skybox-le9Ray Allen[Jersey Proof] #9未評級—Grade 9—PSA 10—
- basketball-cards-2003-skybox-le9Ray Allen[Photographer Proof] #9未評級—Grade 9—PSA 10—
- basketball-cards-2003-skybox-le9Ray Allen[Executive Proof] #9未評級—Grade 9—PSA 10—
- basketball-cards-2003-skybox-le10Sam Cassell[Jersey Proof] #10未評級—Grade 9—PSA 10—
- basketball-cards-2003-skybox-le10Sam Cassell[Gold Proof] #10未評級—Grade 9—PSA 10—
- basketball-cards-2003-skybox-le10Sam Cassell[Executive Proof] #10未評級—Grade 9—PSA 10—
- basketball-cards-2003-skybox-le10Sam Cassell[Artist Proof] #10未評級—Grade 9—PSA 10—
- basketball-cards-2003-skybox-le10Sam Cassell[Photographer Proof] #10未評級—Grade 9—PSA 10—
- basketball-cards-2003-skybox-le11Andre Miller[Photographer Proof] #11未評級—Grade 9—PSA 10—
- basketball-cards-2003-skybox-le11Andre Miller[Artist Proof] #11未評級—Grade 9—PSA 10—
- basketball-cards-2003-skybox-le11Andre Miller[Executive Proof] #11未評級—Grade 9—PSA 10—
- basketball-cards-2003-skybox-le11Andre Miller[Gold Proof] #11未評級—Grade 9—PSA 10—
- basketball-cards-2003-skybox-le11Andre Miller[Jersey Proof] #11未評級—Grade 9—PSA 10—
- basketball-cards-2003-skybox-le11Andre Miller#11未評級—Grade 9—PSA 10—
- basketball-cards-2003-skybox-le12Dirk Nowitzki[Photographer Proof] #12未評級—Grade 9—PSA 10—
- basketball-cards-2003-skybox-le12Dirk Nowitzki[Artist Proof] #12未評級—Grade 9—PSA 10—
- basketball-cards-2003-skybox-le12Dirk Nowitzki[Executive Proof] #12未評級—Grade 9—PSA 10—
- basketball-cards-2003-skybox-le12Dirk Nowitzki[Gold Proof] #12未評級—Grade 9—PSA 10—
- basketball-cards-2003-skybox-le12Dirk Nowitzki[Jersey Proof] #12未評級—Grade 9—PSA 10—
- basketball-cards-2003-skybox-le13Zach Randolph[Executive Proof] #13未評級—Grade 9—PSA 10—
- basketball-cards-2003-skybox-le13Zach Randolph[Artist Proof] #13未評級—Grade 9—PSA 10—
- basketball-cards-2003-skybox-le13Zach Randolph[Jersey Proof] #13未評級—Grade 9—PSA 10—
- basketball-cards-2003-skybox-le13Zach Randolph[Gold Proof] #13未評級—Grade 9—PSA 10—
- basketball-cards-2003-skybox-le13Zach Randolph[Photographer Proof] #13未評級—Grade 9—PSA 10—
- basketball-cards-2003-skybox-le14Tim Duncan[Artist Proof] #14未評級—Grade 9—PSA 10—
- basketball-cards-2003-skybox-le14Tim Duncan[Executive Proof] #14未評級—Grade 9—PSA 10—
- basketball-cards-2003-skybox-le14Tim Duncan[Gold Proof] #14未評級—Grade 9—PSA 10—
- basketball-cards-2003-skybox-le14Tim Duncan[Jersey Proof] #14未評級—Grade 9—PSA 10—
- basketball-cards-2003-skybox-le14Tim Duncan[Photographer Proof] #14未評級—Grade 9—PSA 10—
- basketball-cards-2003-skybox-le15Gary Payton[Artist Proof] #15未評級—Grade 9—PSA 10—
- basketball-cards-2003-skybox-le15Gary Payton[Jersey Proof] #15未評級—Grade 9—PSA 10—
- basketball-cards-2003-skybox-le15Gary Payton[Gold Proof] #15未評級—Grade 9—PSA 10—
- basketball-cards-2003-skybox-le15Gary Payton[Executive Proof] #15未評級—Grade 9—PSA 10—
- basketball-cards-2003-skybox-le15Gary Payton[Photographer Proof] #15未評級—Grade 9—PSA 10—
- basketball-cards-2003-skybox-le16Ben Wallace[Artist Proof] #16未評級—Grade 9—PSA 10—
- basketball-cards-2003-skybox-le16Ben Wallace[Photographer Proof] #16未評級—Grade 9—PSA 10—
- basketball-cards-2003-skybox-le16Ben Wallace[Jersey Proof] #16未評級—Grade 9—PSA 10—
- basketball-cards-2003-skybox-le16Ben Wallace[Gold Proof] #16未評級—Grade 9—PSA 10—
- basketball-cards-2003-skybox-le16Ben Wallace[Executive Proof] #16未評級—Grade 9—PSA 10—
- basketball-cards-2003-skybox-le17Michael Finley[Gold Proof] #17未評級—Grade 9—PSA 10—
- basketball-cards-2003-skybox-le17Michael Finley[Artist Proof] #17未評級—Grade 9—PSA 10—
- basketball-cards-2003-skybox-le17Michael Finley[Jersey Proof] #17未評級—Grade 9—PSA 10—
- basketball-cards-2003-skybox-le17Michael Finley[Photographer Proof] #17未評級—Grade 9—PSA 10—
- basketball-cards-2003-skybox-le17Michael Finley[Executive Proof] #17未評級—Grade 9—PSA 10—
- basketball-cards-2003-skybox-le18David Wesley[Gold Proof] #18未評級—Grade 9—PSA 10—
- basketball-cards-2003-skybox-le18David Wesley[Artist Proof] #18未評級—Grade 9—PSA 10—
- basketball-cards-2003-skybox-le18David Wesley[Executive Proof] #18未評級—Grade 9—PSA 10—
- basketball-cards-2003-skybox-le18David Wesley[Jersey Proof] #18未評級—Grade 9—PSA 10—
- basketball-cards-2003-skybox-le18David Wesley[Photographer Proof] #18未評級—Grade 9—PSA 10—
- basketball-cards-2003-skybox-le19Nick Van Exel[Jersey Proof] #19未評級—Grade 9—PSA 10—
- basketball-cards-2003-skybox-le19Nick Van Exel[Artist Proof] #19未評級—Grade 9—PSA 10—
- basketball-cards-2003-skybox-le19Nick Van Exel[Executive Proof] #19未評級—Grade 9—PSA 10—
- basketball-cards-2003-skybox-le19Nick Van Exel[Photographer Proof] #19未評級—Grade 9—PSA 10—
- basketball-cards-2003-skybox-le19Nick Van Exel[Gold Proof] #19未評級—Grade 9—PSA 10—
- basketball-cards-2003-skybox-le19Nick Van Exel#19未評級—Grade 9—PSA 10—
- basketball-cards-2003-skybox-le20Marcus Camby[Jersey Proof] #20未評級—Grade 9—PSA 10—
- basketball-cards-2003-skybox-le20Marcus Camby[Gold Proof] #20未評級—Grade 9—PSA 10—
- basketball-cards-2003-skybox-le20Marcus Camby[Artist Proof] #20未評級—Grade 9—PSA 10—
- basketball-cards-2003-skybox-le20Marcus Camby[Executive Proof] #20未評級—Grade 9—PSA 10—
- basketball-cards-2003-skybox-le20Marcus Camby[Photographer Proof] #20未評級—Grade 9—PSA 10—
- basketball-cards-2003-skybox-le21Gilbert Arenas[Artist Proof] #21未評級—Grade 9—PSA 10—
- basketball-cards-2003-skybox-le21Gilbert Arenas[Jersey Proof] #21未評級—Grade 9—PSA 10—
- basketball-cards-2003-skybox-le21Gilbert Arenas[Photographer Proof] #21未評級—Grade 9—PSA 10—
- basketball-cards-2003-skybox-le21Gilbert Arenas[Executive Proof] #21未評級—Grade 9—PSA 10—
- basketball-cards-2003-skybox-le22Marcus Haislip[Photographer Proof] #22未評級—Grade 9—PSA 10—
- basketball-cards-2003-skybox-le22Marcus Haislip[Executive Proof] #22未評級—Grade 9—PSA 10—
- basketball-cards-2003-skybox-le22Marcus Haislip#22未評級—Grade 9—PSA 10—
- basketball-cards-2003-skybox-le22Marcus Haislip[Artist Proof] #22未評級—Grade 9—PSA 10—
- basketball-cards-2003-skybox-le22Marcus Haislip[Gold Proof] #22未評級—Grade 9—PSA 10—
- basketball-cards-2003-skybox-le22Marcus Haislip[Jersey Proof] #22未評級—Grade 9—PSA 10—
- basketball-cards-2003-skybox-le23Cuttino Mobley[Artist Proof] #23未評級—Grade 9—PSA 10—
- basketball-cards-2003-skybox-le23Cuttino Mobley[Gold Proof] #23未評級—Grade 9—PSA 10—
- basketball-cards-2003-skybox-le23Cuttino Mobley[Executive Proof] #23未評級—Grade 9—PSA 10—
- basketball-cards-2003-skybox-le23Cuttino Mobley[Photographer Proof] #23未評級—Grade 9—PSA 10—
- basketball-cards-2003-skybox-le23Cuttino Mobley[Jersey Proof] #23未評級—Grade 9—PSA 10—
- basketball-cards-2003-skybox-le23Cuttino Mobley#23未評級—Grade 9—PSA 10—
- basketball-cards-2003-skybox-le24Tayshaun Prince[Executive Proof] #24未評級—Grade 9—PSA 10—
- basketball-cards-2003-skybox-le24Tayshaun Prince[Photographer Proof] #24未評級—Grade 9—PSA 10—
- basketball-cards-2003-skybox-le24Tayshaun Prince[Gold Proof] #24未評級—Grade 9—PSA 10—
- basketball-cards-2003-skybox-le24Tayshaun Prince[Jersey Proof] #24未評級—Grade 9—PSA 10—
- basketball-cards-2003-skybox-le24Tayshaun Prince[Artist Proof] #24未評級—Grade 9—PSA 10—
- basketball-cards-2003-skybox-le25Chris Webber[Executive Proof] #25未評級—Grade 9—PSA 10—
- basketball-cards-2003-skybox-le25Chris Webber[Gold Proof] #25未評級—Grade 9—PSA 10—
- basketball-cards-2003-skybox-le25Chris Webber[Photographer Proof] #25未評級—Grade 9—PSA 10—
- basketball-cards-2003-skybox-le25Chris Webber[Jersey Proof] #25未評級—Grade 9—PSA 10—
- basketball-cards-2003-skybox-le25Chris Webber[Artist Proof] #25未評級—Grade 9—PSA 10—
- basketball-cards-2003-skybox-le26Reggie Miller[Photographer Proof] #26未評級—Grade 9—PSA 10—
- basketball-cards-2003-skybox-le26Reggie Miller[Jersey Proof] #26未評級—Grade 9—PSA 10—
- basketball-cards-2003-skybox-le26Reggie Miller[Artist Proof] #26未評級—Grade 9—PSA 10—
- basketball-cards-2003-skybox-le26Reggie Miller[Executive Proof] #26未評級—Grade 9—PSA 10—
- basketball-cards-2003-skybox-le26Reggie Miller#26未評級—Grade 9—PSA 10—
- basketball-cards-2003-skybox-le27Chauncey Billups[Photographer Proof] #27未評級—Grade 9—PSA 10—
- basketball-cards-2003-skybox-le27Chauncey Billups[Gold Proof] #27未評級—Grade 9—PSA 10—
- basketball-cards-2003-skybox-le27Chauncey Billups[Executive Proof] #27未評級—Grade 9—PSA 10—
- basketball-cards-2003-skybox-le27Chauncey Billups[Artist Proof] #27未評級—Grade 9—PSA 10—
- basketball-cards-2003-skybox-le27Chauncey Billups[Jersey Proof] #27未評級—Grade 9—PSA 10—
- basketball-cards-2003-skybox-le28Quentin Richardson[Executive Proof] #28未評級—Grade 9—PSA 10—
- basketball-cards-2003-skybox-le28Quentin Richardson[Photographer Proof] #28未評級—Grade 9—PSA 10—
- basketball-cards-2003-skybox-le28Quentin Richardson[Jersey Proof] #28未評級—Grade 9—PSA 10—
- basketball-cards-2003-skybox-le28Quentin Richardson[Gold Proof] #28未評級—Grade 9—PSA 10—
- basketball-cards-2003-skybox-le28Quentin Richardson[Artist Proof] #28未評級—Grade 9—PSA 10—
- basketball-cards-2003-skybox-le29Mike Dunleavy[Photographer Proof] #29未評級—Grade 9—PSA 10—
- basketball-cards-2003-skybox-le29Mike Dunleavy#29未評級—Grade 9—PSA 10—
- basketball-cards-2003-skybox-le29Mike Dunleavy[Artist Proof] #29未評級—Grade 9—PSA 10—
- basketball-cards-2003-skybox-le29Mike Dunleavy[Executive Proof] #29未評級—Grade 9—PSA 10—
- basketball-cards-2003-skybox-le29Mike Dunleavy[Gold Proof] #29未評級—Grade 9—PSA 10—
- basketball-cards-2003-skybox-le29Mike Dunleavy[Jersey Proof] #29未評級—Grade 9—PSA 10—
- basketball-cards-2003-skybox-le30Karl Malone[Executive Proof] #30未評級—Grade 9—PSA 10—
- basketball-cards-2003-skybox-le30Karl Malone[Gold Proof] #30未評級—Grade 9—PSA 10—
- basketball-cards-2003-skybox-le30Karl Malone[Jersey Proof] #30未評級—Grade 9—PSA 10—
- basketball-cards-2003-skybox-le30Karl Malone[Photographer Proof] #30未評級—Grade 9—PSA 10—
- basketball-cards-2003-skybox-le30Karl Malone[Artist Proof] #30未評級—Grade 9—PSA 10—
- basketball-cards-2003-skybox-le31Yao Ming[Photographer Proof] #31未評級—Grade 9—PSA 10—
- basketball-cards-2003-skybox-le31Yao Ming[Executive Proof] #31未評級—Grade 9—PSA 10—
- basketball-cards-2003-skybox-le31Yao Ming[Artist Proof] #31未評級—Grade 9—PSA 10—
- basketball-cards-2003-skybox-le32Tyson Chandler[Artist Proof] #32未評級—Grade 9—PSA 10—
- basketball-cards-2003-skybox-le32Tyson Chandler[Executive Proof] #32未評級—Grade 9—PSA 10—
- basketball-cards-2003-skybox-le32Tyson Chandler[Gold Proof] #32未評級—Grade 9—PSA 10—
- basketball-cards-2003-skybox-le32Tyson Chandler[Jersey Proof] #32未評級—Grade 9—PSA 10—
- basketball-cards-2003-skybox-le32Tyson Chandler[Photographer Proof] #32未評級—Grade 9—PSA 10—
- basketball-cards-2003-skybox-le33Jason Williams[Photographer Proof] #33未評級—Grade 9—PSA 10—
- basketball-cards-2003-skybox-le33Jason Williams[Gold Proof] #33未評級—Grade 9—PSA 10—
- basketball-cards-2003-skybox-le33Jason Williams[Executive Proof] #33未評級—Grade 9—PSA 10—
- basketball-cards-2003-skybox-le33Jason Williams[Artist Proof] #33未評級—Grade 9—PSA 10—
- basketball-cards-2003-skybox-le33Jason Williams[Jersey Proof] #33未評級—Grade 9—PSA 10—
- basketball-cards-2003-skybox-le34Eddie Griffin#34未評級—Grade 9—PSA 10—
- basketball-cards-2003-skybox-le34Eddie Griffin[Photographer Proof] #34未評級—Grade 9—PSA 10—
- basketball-cards-2003-skybox-le34Eddie Griffin[Jersey Proof] #34未評級—Grade 9—PSA 10—
- basketball-cards-2003-skybox-le34Eddie Griffin[Gold Proof] #34未評級—Grade 9—PSA 10—
- basketball-cards-2003-skybox-le34Eddie Griffin[Executive Proof] #34未評級—Grade 9—PSA 10—
- basketball-cards-2003-skybox-le34Eddie Griffin[Artist Proof] #34未評級—Grade 9—PSA 10—
- basketball-cards-2003-skybox-le35Eddie Jones[Artist Proof] #35未評級—Grade 9—PSA 10—
- basketball-cards-2003-skybox-le35Eddie Jones[Executive Proof] #35未評級—Grade 9—PSA 10—
- basketball-cards-2003-skybox-le35Eddie Jones[Jersey Proof] #35未評級—Grade 9—PSA 10—
- basketball-cards-2003-skybox-le35Eddie Jones[Photographer Proof] #35未評級—Grade 9—PSA 10—
- basketball-cards-2003-skybox-le35Eddie Jones#35未評級—Grade 9—PSA 10—
- basketball-cards-2003-skybox-le36Jamaal Tinsley[Gold Proof] #36未評級—Grade 9—PSA 10—
- basketball-cards-2003-skybox-le36Jamaal Tinsley#36未評級—Grade 9—PSA 10—
- basketball-cards-2003-skybox-le36Jamaal Tinsley[Photographer Proof] #36未評級—Grade 9—PSA 10—
- basketball-cards-2003-skybox-le36Jamaal Tinsley[Artist Proof] #36未評級—Grade 9—PSA 10—
- basketball-cards-2003-skybox-le36Jamaal Tinsley[Jersey Proof] #36未評級—Grade 9—PSA 10—
- basketball-cards-2003-skybox-le36Jamaal Tinsley[Executive Proof] #36未評級—Grade 9—PSA 10—
- basketball-cards-2003-skybox-le37Michael Redd[Artist Proof] #37未評級—Grade 9—PSA 10—
- basketball-cards-2003-skybox-le37Michael Redd[Executive Proof] #37未評級—Grade 9—PSA 10—
- basketball-cards-2003-skybox-le37Michael Redd#37未評級—Grade 9—PSA 10—
- basketball-cards-2003-skybox-le37Michael Redd[Photographer Proof] #37未評級—Grade 9—PSA 10—
- basketball-cards-2003-skybox-le37Michael Redd[Jersey Proof] #37未評級—Grade 9—PSA 10—
- basketball-cards-2003-skybox-le38Elton Brand[Artist Proof] #38未評級—Grade 9—PSA 10—
- basketball-cards-2003-skybox-le38Elton Brand#38未評級—Grade 9—PSA 10—
- basketball-cards-2003-skybox-le38Elton Brand[Photographer Proof] #38未評級—Grade 9—PSA 10—
- basketball-cards-2003-skybox-le38Elton Brand[Jersey Proof] #38未評級—Grade 9—PSA 10—
- basketball-cards-2003-skybox-le38Elton Brand[Gold Proof] #38未評級—Grade 9—PSA 10—
- basketball-cards-2003-skybox-le38Elton Brand[Executive Proof] #38未評級—Grade 9—PSA 10—
- basketball-cards-2003-skybox-le39Rashard Lewis[Photographer Proof] #39未評級—Grade 9—PSA 10—
- basketball-cards-2003-skybox-le39Rashard Lewis#39未評級—Grade 9—PSA 10—
- basketball-cards-2003-skybox-le39Rashard Lewis[Jersey Proof] #39未評級—Grade 9—PSA 10—
- basketball-cards-2003-skybox-le39Rashard Lewis[Gold Proof] #39未評級—Grade 9—PSA 10—
- basketball-cards-2003-skybox-le39Rashard Lewis[Executive Proof] #39未評級—Grade 9—PSA 10—
- basketball-cards-2003-skybox-le39Rashard Lewis[Artist Proof] #39未評級—Grade 9—PSA 10—
- basketball-cards-2003-skybox-le40Vince Carter[Executive Proof] #40未評級—Grade 9—PSA 10—
- basketball-cards-2003-skybox-le40Vince Carter[Jersey Proof] #40未評級—Grade 9—PSA 10—
- basketball-cards-2003-skybox-le40Vince Carter[Gold Proof] #40未評級—Grade 9—PSA 10—
- basketball-cards-2003-skybox-le40Vince Carter[Artist Proof] #40未評級—Grade 9—PSA 10—
- basketball-cards-2003-skybox-le40Vince Carter[Photographer Proof] #40未評級—Grade 9—PSA 10—
- basketball-cards-2003-skybox-le41Wally Szczerbiak[Photographer Proof] #41未評級—Grade 9—PSA 10—
- basketball-cards-2003-skybox-le41Wally Szczerbiak[Jersey Proof] #41未評級—Grade 9—PSA 10—
- basketball-cards-2003-skybox-le41Wally Szczerbiak[Gold Proof] #41未評級—Grade 9—PSA 10—
- basketball-cards-2003-skybox-le41Wally Szczerbiak[Executive Proof] #41未評級—Grade 9—PSA 10—
- basketball-cards-2003-skybox-le41Wally Szczerbiak[Artist Proof] #41未評級—Grade 9—PSA 10—
- basketball-cards-2003-skybox-le42Chris Wilcox[Jersey Proof] #42未評級—Grade 9—PSA 10—
- basketball-cards-2003-skybox-le42Chris Wilcox#42未評級—Grade 9—PSA 10—
- basketball-cards-2003-skybox-le42Chris Wilcox[Photographer Proof] #42未評級—Grade 9—PSA 10—
- basketball-cards-2003-skybox-le42Chris Wilcox[Gold Proof] #42未評級—Grade 9—PSA 10—
- basketball-cards-2003-skybox-le42Chris Wilcox[Executive Proof] #42未評級—Grade 9—PSA 10—
- basketball-cards-2003-skybox-le42Chris Wilcox[Artist Proof] #42未評級—Grade 9—PSA 10—
- basketball-cards-2003-skybox-le43Kenyon Martin[Artist Proof] #43未評級—Grade 9—PSA 10—
- basketball-cards-2003-skybox-le43Kenyon Martin#43未評級—Grade 9—PSA 10—
- basketball-cards-2003-skybox-le43Kenyon Martin[Photographer Proof] #43未評級—Grade 9—PSA 10—
- basketball-cards-2003-skybox-le43Kenyon Martin[Jersey Proof] #43未評級—Grade 9—PSA 10—
- basketball-cards-2003-skybox-le43Kenyon Martin[Gold Proof] #43未評級—Grade 9—PSA 10—
- basketball-cards-2003-skybox-le43Kenyon Martin[Executive Proof] #43未評級—Grade 9—PSA 10—
- basketball-cards-2003-skybox-le44Shaquille O'Neal[Jersey Proof] #44未評級—Grade 9—PSA 10—
- basketball-cards-2003-skybox-le44Shaquille O'Neal[Photographer Proof] #44未評級—Grade 9—PSA 10—
- basketball-cards-2003-skybox-le44Shaquille O'Neal[Artist Proof] #44未評級—Grade 9—PSA 10—
- basketball-cards-2003-skybox-le44Shaquille O'Neal[Executive Proof] #44未評級—Grade 9—PSA 10—
- basketball-cards-2003-skybox-le44Shaquille O'Neal[Gold Proof] #44未評級—Grade 9—PSA 10—
- basketball-cards-2003-skybox-le45Baron Davis[Artist Proof] #45未評級—Grade 9—PSA 10—
- basketball-cards-2003-skybox-le45Baron Davis[Jersey Proof] #45未評級—Grade 9—PSA 10—
- basketball-cards-2003-skybox-le45Baron Davis#45未評級—Grade 9—PSA 10—
- basketball-cards-2003-skybox-le45Baron Davis[Photographer Proof] #45未評級—Grade 9—PSA 10—
- basketball-cards-2003-skybox-le45Baron Davis[Gold Proof] #45未評級—Grade 9—PSA 10—
- basketball-cards-2003-skybox-le45Baron Davis[Executive Proof] #45未評級—Grade 9—PSA 10—
- basketball-cards-2003-skybox-le46Pau Gasol[Artist Proof] #46未評級—Grade 9—PSA 10—
- basketball-cards-2003-skybox-le46Pau Gasol[Jersey Proof] #46未評級—Grade 9—PSA 10—
- basketball-cards-2003-skybox-le46Pau Gasol[Photographer Proof] #46未評級—Grade 9—PSA 10—
- basketball-cards-2003-skybox-le46Pau Gasol[Gold Proof] #46未評級—Grade 9—PSA 10—
- basketball-cards-2003-skybox-le46Pau Gasol[Executive Proof] #46未評級—Grade 9—PSA 10—
- basketball-cards-2003-skybox-le47Dikembe Mutombo[Jersey Proof] #47未評級—Grade 9—PSA 10—
- basketball-cards-2003-skybox-le47Dikembe Mutombo[Photographer Proof] #47未評級—Grade 9—PSA 10—
- basketball-cards-2003-skybox-le47Dikembe Mutombo[Gold Proof] #47未評級—Grade 9—PSA 10—
- basketball-cards-2003-skybox-le47Dikembe Mutombo[Executive Proof] #47未評級—Grade 9—PSA 10—
- basketball-cards-2003-skybox-le47Dikembe Mutombo[Artist Proof] #47未評級—Grade 9—PSA 10—
- basketball-cards-2003-skybox-le48Shane Battier#48未評級—Grade 9—PSA 10—
- basketball-cards-2003-skybox-le48Shane Battier[Photographer Proof] #48未評級—Grade 9—PSA 10—
- basketball-cards-2003-skybox-le48Shane Battier[Jersey Proof] #48未評級—Grade 9—PSA 10—
- basketball-cards-2003-skybox-le48Shane Battier[Gold Proof] #48未評級—Grade 9—PSA 10—
- basketball-cards-2003-skybox-le48Shane Battier[Executive Proof] #48未評級—Grade 9—PSA 10—
- basketball-cards-2003-skybox-le48Shane Battier[Artist Proof] #48未評級—Grade 9—PSA 10—
- basketball-cards-2003-skybox-le49Drew Gooden[Gold Proof] #49未評級—Grade 9—PSA 10—
- basketball-cards-2003-skybox-le49Drew Gooden[Photographer Proof] #49未評級—Grade 9—PSA 10—
- basketball-cards-2003-skybox-le49Drew Gooden[Executive Proof] #49未評級—Grade 9—PSA 10—
- basketball-cards-2003-skybox-le49Drew Gooden[Artist Proof] #49未評級—Grade 9—PSA 10—
- basketball-cards-2003-skybox-le49Drew Gooden[Jersey Proof] #49未評級—Grade 9—PSA 10—
- basketball-cards-2003-skybox-le50Lamar Odom[Gold Proof] #50未評級—Grade 9—PSA 10—
- basketball-cards-2003-skybox-le50Lamar Odom[Photographer Proof] #50未評級—Grade 9—PSA 10—
- basketball-cards-2003-skybox-le50Lamar Odom[Executive Proof] #50未評級—Grade 9—PSA 10—
- basketball-cards-2003-skybox-le50Lamar Odom#50未評級—Grade 9—PSA 10—
- basketball-cards-2003-skybox-le50Lamar Odom[Artist Proof] #50未評級—Grade 9—PSA 10—
- basketball-cards-2003-skybox-le50Lamar Odom[Jersey Proof] #50未評級—Grade 9—PSA 10—
- basketball-cards-2003-skybox-le51Glenn Robinson[Artist Proof] #51未評級—Grade 9—PSA 10—
- basketball-cards-2003-skybox-le51Glenn Robinson[Executive Proof] #51未評級—Grade 9—PSA 10—
- basketball-cards-2003-skybox-le51Glenn Robinson[Gold Proof] #51未評級—Grade 9—PSA 10—
- basketball-cards-2003-skybox-le51Glenn Robinson[Jersey Proof] #51未評級—Grade 9—PSA 10—
- basketball-cards-2003-skybox-le52Tim Thomas[Photographer Proof] #52未評級—Grade 9—PSA 10—
- basketball-cards-2003-skybox-le52Tim Thomas[Gold Proof] #52未評級—Grade 9—PSA 10—
- basketball-cards-2003-skybox-le52Tim Thomas[Executive Proof] #52未評級—Grade 9—PSA 10—
- basketball-cards-2003-skybox-le52Tim Thomas[Artist Proof] #52未評級—Grade 9—PSA 10—
- basketball-cards-2003-skybox-le52Tim Thomas[Jersey Proof] #52未評級—Grade 9—PSA 10—
- basketball-cards-2003-skybox-le53Shawn Marion[Photographer Proof] #53未評級—Grade 9—PSA 10—
- basketball-cards-2003-skybox-le53Shawn Marion[Artist Proof] #53未評級—Grade 9—PSA 10—
- basketball-cards-2003-skybox-le53Shawn Marion[Jersey Proof] #53未評級—Grade 9—PSA 10—
- basketball-cards-2003-skybox-le53Shawn Marion[Gold Proof] #53未評級—Grade 9—PSA 10—
- basketball-cards-2003-skybox-le53Shawn Marion[Executive Proof] #53未評級—Grade 9—PSA 10—
- basketball-cards-2003-skybox-le54Kevin Garnett[Artist Proof] #54未評級—Grade 9—PSA 10—
- basketball-cards-2003-skybox-le54Kevin Garnett[Executive Proof] #54未評級—Grade 9—PSA 10—
- basketball-cards-2003-skybox-le54Kevin Garnett[Gold Proof] #54未評級—Grade 9—PSA 10—
- basketball-cards-2003-skybox-le54Kevin Garnett[Jersey Proof] #54未評級—Grade 9—PSA 10—
- basketball-cards-2003-skybox-le54Kevin Garnett[Photographer Proof] #54未評級—Grade 9—PSA 10—
- basketball-cards-2003-skybox-le55Stephon Marbury[Gold Proof] #55未評級—Grade 9—PSA 10—
- basketball-cards-2003-skybox-le55Stephon Marbury[Executive Proof] #55未評級—Grade 9—PSA 10—
- basketball-cards-2003-skybox-le55Stephon Marbury[Artist Proof] #55未評級—Grade 9—PSA 10—
- basketball-cards-2003-skybox-le55Stephon Marbury[Photographer Proof] #55未評級—Grade 9—PSA 10—
- basketball-cards-2003-skybox-le55Stephon Marbury[Jersey Proof] #55未評級—Grade 9—PSA 10—
- basketball-cards-2003-skybox-le56Rasheed Wallace[Photographer Proof] #56未評級—Grade 9—PSA 10—
- basketball-cards-2003-skybox-le56Rasheed Wallace[Jersey Proof] #56未評級—Grade 9—PSA 10—
- basketball-cards-2003-skybox-le56Rasheed Wallace[Executive Proof] #56未評級—Grade 9—PSA 10—
- basketball-cards-2003-skybox-le56Rasheed Wallace[Artist Proof] #56未評級—Grade 9—PSA 10—
- basketball-cards-2003-skybox-le57Troy Hudson[Jersey Proof] #57未評級—Grade 9—PSA 10—
- basketball-cards-2003-skybox-le57Troy Hudson[Gold Proof] #57未評級—Grade 9—PSA 10—
- basketball-cards-2003-skybox-le57Troy Hudson[Artist Proof] #57未評級—Grade 9—PSA 10—
- basketball-cards-2003-skybox-le57Troy Hudson[Photographer Proof] #57未評級—Grade 9—PSA 10—
- basketball-cards-2003-skybox-le57Troy Hudson[Executive Proof] #57未評級—Grade 9—PSA 10—
- basketball-cards-2003-skybox-le58Mike Bibby[Artist Proof] #58未評級—Grade 9—PSA 10—
- basketball-cards-2003-skybox-le58Mike Bibby[Executive Proof] #58未評級—Grade 9—PSA 10—
- basketball-cards-2003-skybox-le58Mike Bibby[Gold Proof] #58未評級—Grade 9—PSA 10—
- basketball-cards-2003-skybox-le58Mike Bibby[Jersey Proof] #58未評級—Grade 9—PSA 10—
- basketball-cards-2003-skybox-le58Mike Bibby[Photographer Proof] #58未評級—Grade 9—PSA 10—
- basketball-cards-2003-skybox-le58Mike Bibby#58未評級—Grade 9—PSA 10—
- basketball-cards-2003-skybox-le59Jason Kidd[Jersey Proof] #59未評級—Grade 9—PSA 10—
- basketball-cards-2003-skybox-le59Jason Kidd[Photographer Proof] #59未評級—Grade 9—PSA 10—
- basketball-cards-2003-skybox-le59Jason Kidd[Artist Proof] #59未評級—Grade 9—PSA 10—
- basketball-cards-2003-skybox-le59Jason Kidd[Executive Proof] #59未評級—Grade 9—PSA 10—
- basketball-cards-2003-skybox-le59Jason Kidd[Gold Proof] #59未評級—Grade 9—PSA 10—
- basketball-cards-2003-skybox-le59Jason Kidd#59未評級—Grade 9—PSA 10—
- basketball-cards-2003-skybox-le60Tony Parker[Gold Proof] #60未評級—Grade 9—PSA 10—
- basketball-cards-2003-skybox-le60Tony Parker[Jersey Proof] #60未評級—Grade 9—PSA 10—
- basketball-cards-2003-skybox-le60Tony Parker[Artist Proof] #60未評級—Grade 9—PSA 10—
- basketball-cards-2003-skybox-le60Tony Parker[Photographer Proof] #60未評級—Grade 9—PSA 10—
- basketball-cards-2003-skybox-le60Tony Parker[Executive Proof] #60未評級—Grade 9—PSA 10—
- basketball-cards-2003-skybox-le61Andrei Kirilenko[Gold Proof] #61未評級—Grade 9—PSA 10—
- basketball-cards-2003-skybox-le61Andrei Kirilenko[Photographer Proof] #61未評級—Grade 9—PSA 10—
- basketball-cards-2003-skybox-le61Andrei Kirilenko[Jersey Proof] #61未評級—Grade 9—PSA 10—
- basketball-cards-2003-skybox-le61Andrei Kirilenko[Artist Proof] #61未評級—Grade 9—PSA 10—
- basketball-cards-2003-skybox-le61Andrei Kirilenko[Executive Proof] #61未評級—Grade 9—PSA 10—
- basketball-cards-2003-skybox-le62Manu Ginobili[Jersey Proof] #62未評級—Grade 9—PSA 10—
- basketball-cards-2003-skybox-le62Manu Ginobili[Executive Proof] #62未評級—Grade 9—PSA 10—
- basketball-cards-2003-skybox-le62Manu Ginobili[Artist Proof] #62未評級—Grade 9—PSA 10—
- basketball-cards-2003-skybox-le62Manu Ginobili[Photographer Proof] #62未評級—Grade 9—PSA 10—
- basketball-cards-2003-skybox-le63Kerry Kittles[Photographer Proof] #63未評級—Grade 9—PSA 10—
- basketball-cards-2003-skybox-le63Kerry Kittles[Gold Proof] #63未評級—Grade 9—PSA 10—
- basketball-cards-2003-skybox-le63Kerry Kittles[Executive Proof] #63未評級—Grade 9—PSA 10—
- basketball-cards-2003-skybox-le63Kerry Kittles[Artist Proof] #63未評級—Grade 9—PSA 10—
- basketball-cards-2003-skybox-le63Kerry Kittles#63未評級—Grade 9—PSA 10—
- basketball-cards-2003-skybox-le63Kerry Kittles[Jersey Proof] #63未評級—Grade 9—PSA 10—
- basketball-cards-2003-skybox-le64Brent Barry[Gold Proof] #64未評級—Grade 9—PSA 10—
- basketball-cards-2003-skybox-le64Brent Barry[Artist Proof] #64未評級—Grade 9—PSA 10—
- basketball-cards-2003-skybox-le64Brent Barry[Executive Proof] #64未評級—Grade 9—PSA 10—
- basketball-cards-2003-skybox-le64Brent Barry[Jersey Proof] #64未評級—Grade 9—PSA 10—
- basketball-cards-2003-skybox-le64Brent Barry[Photographer Proof] #64未評級—Grade 9—PSA 10—
- basketball-cards-2003-skybox-le64Brent Barry#64未評級—Grade 9—PSA 10—
- basketball-cards-2003-skybox-le65Allan Houston[Executive Proof] #65未評級—Grade 9—PSA 10—
- basketball-cards-2003-skybox-le65Allan Houston[Photographer Proof] #65未評級—Grade 9—PSA 10—
- basketball-cards-2003-skybox-le65Allan Houston[Jersey Proof] #65未評級—Grade 9—PSA 10—
- basketball-cards-2003-skybox-le65Allan Houston[Gold Proof] #65未評級—Grade 9—PSA 10—
- basketball-cards-2003-skybox-le65Allan Houston[Artist Proof] #65未評級—Grade 9—PSA 10—
- basketball-cards-2003-skybox-le66Morris Peterson[Photographer Proof] #66未評級—Grade 9—PSA 10—
- basketball-cards-2003-skybox-le66Morris Peterson[Gold Proof] #66未評級—Grade 9—PSA 10—
- basketball-cards-2003-skybox-le66Morris Peterson[Executive Proof] #66未評級—Grade 9—PSA 10—
- basketball-cards-2003-skybox-le66Morris Peterson[Jersey Proof] #66未評級—Grade 9—PSA 10—
- basketball-cards-2003-skybox-le66Morris Peterson#66未評級—Grade 9—PSA 10—
- basketball-cards-2003-skybox-le66Morris Peterson[Artist Proof] #66未評級—Grade 9—PSA 10—
- basketball-cards-2003-skybox-le67Tracy McGrady[Gold Proof] #67未評級—Grade 9—PSA 10—
- basketball-cards-2003-skybox-le67Tracy McGrady[Executive Proof] #67未評級—Grade 9—PSA 10—
- basketball-cards-2003-skybox-le67Tracy McGrady[Artist Proof] #67未評級—Grade 9—PSA 10HK$1,098.34
- basketball-cards-2003-skybox-le67Tracy McGrady[Jersey Proof] #67未評級—Grade 9—PSA 10—
- basketball-cards-2003-skybox-le67Tracy McGrady[Photographer Proof] #67未評級—Grade 9—PSA 10—
- basketball-cards-2003-skybox-le68Matt Harpring[Photographer Proof] #68未評級—Grade 9—PSA 10—
- basketball-cards-2003-skybox-le68Matt Harpring[Jersey Proof] #68未評級—Grade 9—PSA 10—
- basketball-cards-2003-skybox-le68Matt Harpring[Gold Proof] #68未評級—Grade 9—PSA 10—
- basketball-cards-2003-skybox-le68Matt Harpring[Executive Proof] #68未評級—Grade 9—PSA 10—
- basketball-cards-2003-skybox-le68Matt Harpring[Artist Proof] #68未評級—Grade 9—PSA 10—
- basketball-cards-2003-skybox-le69Erick Dampier#69未評級—Grade 9—PSA 10—
- basketball-cards-2003-skybox-le69Erick Dampier[Photographer Proof] #69未評級—Grade 9—PSA 10—
- basketball-cards-2003-skybox-le69Erick Dampier[Jersey Proof] #69未評級—Grade 9—PSA 10—
- basketball-cards-2003-skybox-le69Erick Dampier[Gold Proof] #69未評級—Grade 9—PSA 10—
- basketball-cards-2003-skybox-le69Erick Dampier[Executive Proof] #69未評級—Grade 9—PSA 10—
- basketball-cards-2003-skybox-le69Erick Dampier[Artist Proof] #69未評級—Grade 9—PSA 10—
- basketball-cards-2003-skybox-le70Jerry Stackhouse[Executive Proof] #70未評級—Grade 9—PSA 10—
- basketball-cards-2003-skybox-le70Jerry Stackhouse[Gold Proof] #70未評級—Grade 9—PSA 10—
- basketball-cards-2003-skybox-le70Jerry Stackhouse[Jersey Proof] #70未評級—Grade 9—PSA 10—
- basketball-cards-2003-skybox-le70Jerry Stackhouse[Photographer Proof] #70未評級—Grade 9—PSA 10—
- basketball-cards-2003-skybox-le70Jerry Stackhouse#70未評級—Grade 9—PSA 10—
- basketball-cards-2003-skybox-le70Jerry Stackhouse[Artist Proof] #70未評級—Grade 9—PSA 10—
- basketball-cards-2003-skybox-le71John Salmons[Executive Proof] #71未評級—Grade 9—PSA 10—
- basketball-cards-2003-skybox-le71John Salmons[Jersey Proof] #71未評級—Grade 9—PSA 10—
- basketball-cards-2003-skybox-le71John Salmons[Photographer Proof] #71未評級—Grade 9—PSA 10—
- basketball-cards-2003-skybox-le71John Salmons#71未評級—Grade 9—PSA 10—
- basketball-cards-2003-skybox-le71John Salmons[Artist Proof] #71未評級—Grade 9—PSA 10—
- basketball-cards-2003-skybox-le72Stephen Jackson[Artist Proof] #72未評級—Grade 9—PSA 10—
- basketball-cards-2003-skybox-le72Stephen Jackson[Executive Proof] #72未評級—Grade 9—PSA 10—
- basketball-cards-2003-skybox-le72Stephen Jackson[Gold Proof] #72未評級—Grade 9—PSA 10—
- basketball-cards-2003-skybox-le72Stephen Jackson[Jersey Proof] #72未評級—Grade 9—PSA 10—
- basketball-cards-2003-skybox-le72Stephen Jackson[Photographer Proof] #72未評級—Grade 9—PSA 10—
- basketball-cards-2003-skybox-le72Stephen Jackson#72未評級—Grade 9—PSA 10—
- basketball-cards-2003-skybox-le73Scottie Pippen[Gold Proof] #73未評級—Grade 9—PSA 10—
- basketball-cards-2003-skybox-le73Scottie Pippen[Executive Proof] #73未評級—Grade 9—PSA 10—
- basketball-cards-2003-skybox-le73Scottie Pippen[Jersey Proof] #73未評級—Grade 9—PSA 10—
- basketball-cards-2003-skybox-le73Scottie Pippen[Photographer Proof] #73未評級—Grade 9—PSA 10—
- basketball-cards-2003-skybox-le73Scottie Pippen[Artist Proof] #73未評級—Grade 9—PSA 10—
- basketball-cards-2003-skybox-le74Dajuan Wagner#74未評級—Grade 9—PSA 10—
- basketball-cards-2003-skybox-le74Dajuan Wagner[Artist Proof] #74未評級—Grade 9—PSA 10—
- basketball-cards-2003-skybox-le74Dajuan Wagner[Executive Proof] #74未評級—Grade 9—PSA 10—
- basketball-cards-2003-skybox-le74Dajuan Wagner[Gold Proof] #74未評級—Grade 9—PSA 10—
- basketball-cards-2003-skybox-le74Dajuan Wagner[Jersey Proof] #74未評級—Grade 9—PSA 10—
- basketball-cards-2003-skybox-le74Dajuan Wagner[Photographer Proof] #74未評級—Grade 9—PSA 10—
- basketball-cards-2003-skybox-le75Keon Clark[Jersey Proof] #75未評級—Grade 9—PSA 10—
- basketball-cards-2003-skybox-le75Keon Clark[Gold Proof] #75未評級—Grade 9—PSA 10—
- basketball-cards-2003-skybox-le75Keon Clark[Executive Proof] #75未評級—Grade 9—PSA 10—
- basketball-cards-2003-skybox-le75Keon Clark[Artist Proof] #75未評級—Grade 9—PSA 10—
- basketball-cards-2003-skybox-le75Keon Clark[Photographer Proof] #75未評級—Grade 9—PSA 10—
- basketball-cards-2003-skybox-le76Carlos Boozer[Executive Proof] #76未評級—Grade 9—PSA 10—
- basketball-cards-2003-skybox-le76Carlos Boozer[Artist Proof] #76未評級—Grade 9—PSA 10—
- basketball-cards-2003-skybox-le76Carlos Boozer[Gold Proof] #76未評級—Grade 9—PSA 10—
- basketball-cards-2003-skybox-le76Carlos Boozer[Jersey Proof] #76未評級—Grade 9—PSA 10—
- basketball-cards-2003-skybox-le76Carlos Boozer[Photographer Proof] #76未評級—Grade 9—PSA 10—
- basketball-cards-2003-skybox-le76Carlos Boozer#76未評級—Grade 9—PSA 10—
- basketball-cards-2003-skybox-le77Steve Nash[Executive Proof] #77未評級—Grade 9—PSA 10—
- basketball-cards-2003-skybox-le77Steve Nash[Gold Proof] #77未評級—Grade 9—PSA 10—
- basketball-cards-2003-skybox-le77Steve Nash[Photographer Proof] #77未評級—Grade 9—PSA 10—
- basketball-cards-2003-skybox-le77Steve Nash[Artist Proof] #77未評級—Grade 9—PSA 10—
- basketball-cards-2003-skybox-le77Steve Nash[Jersey Proof] #77未評級—Grade 9—PSA 10—
- basketball-cards-2003-skybox-le78Nene[Gold Proof] #78未評級—Grade 9—PSA 10—
- basketball-cards-2003-skybox-le78Nene[Photographer Proof] #78未評級—Grade 9—PSA 10—
- basketball-cards-2003-skybox-le78Nene[Jersey Proof] #78未評級—Grade 9—PSA 10—
- basketball-cards-2003-skybox-le78Nene[Executive Proof] #78未評級—Grade 9—PSA 10—
- basketball-cards-2003-skybox-le78Nene#78未評級—Grade 9—PSA 10—
- basketball-cards-2003-skybox-le78Nene[Artist Proof] #78未評級—Grade 9—PSA 10—
- basketball-cards-2003-skybox-le79Keith Van Horn[Gold Proof] #79未評級—Grade 9—PSA 10—
- basketball-cards-2003-skybox-le79Keith Van Horn[Artist Proof] #79未評級—Grade 9—PSA 10—
- basketball-cards-2003-skybox-le79Keith Van Horn[Jersey Proof] #79未評級—Grade 9—PSA 10—
- basketball-cards-2003-skybox-le79Keith Van Horn[Executive Proof] #79未評級—Grade 9—PSA 10—
- basketball-cards-2003-skybox-le79Keith Van Horn[Photographer Proof] #79未評級—Grade 9—PSA 10—
- basketball-cards-2003-skybox-le80Earl Boykins[Artist Proof] #80未評級—Grade 9—PSA 10—
- basketball-cards-2003-skybox-le80Earl Boykins[Executive Proof] #80未評級—Grade 9—PSA 10—
- basketball-cards-2003-skybox-le80Earl Boykins[Photographer Proof] #80未評級—Grade 9—PSA 10—
- basketball-cards-2003-skybox-le80Earl Boykins#80未評級—Grade 9—PSA 10—
- basketball-cards-2003-skybox-le80Earl Boykins[Jersey Proof] #80未評級—Grade 9—PSA 10—
- basketball-cards-2003-skybox-le81Richard Hamilton[Gold Proof] #81未評級—Grade 9—PSA 10—
- basketball-cards-2003-skybox-le81Richard Hamilton#81未評級—Grade 9—PSA 10—
- basketball-cards-2003-skybox-le81Richard Hamilton[Jersey Proof] #81未評級—Grade 9—PSA 10—
- basketball-cards-2003-skybox-le81Richard Hamilton[Photographer Proof] #81未評級—Grade 9—PSA 10—
- basketball-cards-2003-skybox-le81Richard Hamilton[Artist Proof] #81未評級—Grade 9—PSA 10—
- basketball-cards-2003-skybox-le81Richard Hamilton[Executive Proof] #81未評級—Grade 9—PSA 10—
- basketball-cards-2003-skybox-le82Jason Richardson[Executive Proof] #82未評級—Grade 9—PSA 10—
- basketball-cards-2003-skybox-le82Jason Richardson[Artist Proof] #82未評級—Grade 9—PSA 10—
- basketball-cards-2003-skybox-le82Jason Richardson[Gold Proof] #82未評級—Grade 9—PSA 10—
- basketball-cards-2003-skybox-le82Jason Richardson[Jersey Proof] #82未評級—Grade 9—PSA 10—
- basketball-cards-2003-skybox-le82Jason Richardson[Photographer Proof] #82未評級—Grade 9—PSA 10—
- basketball-cards-2003-skybox-le82Jason Richardson#82未評級—Grade 9—PSA 10—
- basketball-cards-2003-skybox-le83Steve Francis[Executive Proof] #83未評級—Grade 9—PSA 10—
- basketball-cards-2003-skybox-le83Steve Francis[Photographer Proof] #83未評級—Grade 9—PSA 10—
- basketball-cards-2003-skybox-le83Steve Francis[Jersey Proof] #83未評級—Grade 9—PSA 10—
- basketball-cards-2003-skybox-le83Steve Francis[Gold Proof] #83未評級—Grade 9—PSA 10—
- basketball-cards-2003-skybox-le84Jermaine O'Neal[Executive Proof] #84未評級—Grade 9—PSA 10—
- basketball-cards-2003-skybox-le84Jermaine O'Neal[Gold Proof] #84未評級—Grade 9—PSA 10—
- basketball-cards-2003-skybox-le84Jermaine O'Neal[Jersey Proof] #84未評級—Grade 9—PSA 10—
- basketball-cards-2003-skybox-le84Jermaine O'Neal[Photographer Proof] #84未評級—Grade 9—PSA 10—
- basketball-cards-2003-skybox-le84Corey Maggette#84未評級—Grade 9—PSA 10—
- basketball-cards-2003-skybox-le84Jermaine O'Neal[Artist Proof] #84未評級—Grade 9—PSA 10—
- basketball-cards-2003-skybox-le85Ron Artest[Gold Proof] #85未評級—Grade 9—PSA 10—
- basketball-cards-2003-skybox-le85Ron Artest[Executive Proof] #85未評級—Grade 9—PSA 10—
- basketball-cards-2003-skybox-le85Ron Artest[Artist Proof] #85未評級—Grade 9—PSA 10—
- basketball-cards-2003-skybox-le85Ron Artest[Photographer Proof] #85未評級—Grade 9—PSA 10—
- basketball-cards-2003-skybox-le85Ron Artest[Jersey Proof] #85未評級—Grade 9—PSA 10—
- basketball-cards-2003-skybox-le86Corey Maggette[Jersey Proof] #86未評級—Grade 9—PSA 10—
- basketball-cards-2003-skybox-le86Corey Maggette[Artist Proof] #86未評級—Grade 9—PSA 10—
- basketball-cards-2003-skybox-le86Corey Maggette[Executive Proof] #86未評級—Grade 9—PSA 10—
- basketball-cards-2003-skybox-le86Corey Maggette#86未評級—Grade 9—PSA 10—
- basketball-cards-2003-skybox-le86Corey Maggette[Photographer Proof] #86未評級—Grade 9—PSA 10—
- basketball-cards-2003-skybox-le86Corey Maggette[Gold Proof] #86未評級—Grade 9—PSA 10—
- basketball-cards-2003-skybox-le87Kwame Brown[Photographer Proof] #87未評級—Grade 9—PSA 10—
- basketball-cards-2003-skybox-le87Kwame Brown[Jersey Proof] #87未評級—Grade 9—PSA 10—
- basketball-cards-2003-skybox-le87Kwame Brown[Gold Proof] #87未評級—Grade 9—PSA 10—
- basketball-cards-2003-skybox-le87Kwame Brown[Executive Proof] #87未評級—Grade 9—PSA 10—
- basketball-cards-2003-skybox-le87Kwame Brown[Artist Proof] #87未評級—Grade 9—PSA 10—
- basketball-cards-2003-skybox-le87Kwame Brown#87未評級—Grade 9—PSA 10—
- basketball-cards-2003-skybox-le88Kobe Bryant[Gold Proof] #88未評級—Grade 9HK$2,157.46PSA 10—
- basketball-cards-2003-skybox-le88Kobe Bryant[Artist Proof] #88未評級—Grade 9—PSA 10—
- basketball-cards-2003-skybox-le88Kobe Bryant[Executive Proof] #88未評級—Grade 9—PSA 10—
- basketball-cards-2003-skybox-le88Kobe Bryant[Jersey Proof] #88未評級—Grade 9—PSA 10—
- basketball-cards-2003-skybox-le88Kobe Bryant[Photographer Proof] #88未評級—Grade 9—PSA 10—
- basketball-cards-2003-skybox-le89Mike Miller[Jersey Proof] #89未評級—Grade 9—PSA 10—
- basketball-cards-2003-skybox-le89Mike Miller[Executive Proof] #89未評級—Grade 9—PSA 10—
- basketball-cards-2003-skybox-le89Mike Miller[Artist Proof] #89未評級—Grade 9—PSA 10—
- basketball-cards-2003-skybox-le89Mike Miller[Gold Proof] #89未評級—Grade 9—PSA 10—
- basketball-cards-2003-skybox-le89Mike Miller[Photographer Proof] #89未評級—Grade 9—PSA 10—
- basketball-cards-2003-skybox-le90Caron Butler[Photographer Proof] #90未評級—Grade 9—PSA 10—
- basketball-cards-2003-skybox-le90Caron Butler[Artist Proof] #90未評級—Grade 9—PSA 10—
- basketball-cards-2003-skybox-le90Caron Butler#90未評級—Grade 9—PSA 10—
- basketball-cards-2003-skybox-le90Caron Butler[Executive Proof] #90未評級—Grade 9—PSA 10—
- basketball-cards-2003-skybox-le90Caron Butler[Gold Proof] #90未評級—Grade 9—PSA 10—
- basketball-cards-2003-skybox-le90Caron Butler[Jersey Proof] #90未評級—Grade 9—PSA 10—
- basketball-cards-2003-skybox-le91Desmond Mason[Artist Proof] #91未評級—Grade 9—PSA 10—
- basketball-cards-2003-skybox-le91Desmond Mason[Executive Proof] #91未評級—Grade 9—PSA 10—
- basketball-cards-2003-skybox-le91Desmond Mason[Gold Proof] #91未評級—Grade 9—PSA 10—
- basketball-cards-2003-skybox-le91Desmond Mason[Jersey Proof] #91未評級—Grade 9—PSA 10—
- basketball-cards-2003-skybox-le91Desmond Mason[Photographer Proof] #91未評級—Grade 9—PSA 10—
- basketball-cards-2003-skybox-le91Desmond Mason#91未評級—Grade 9—PSA 10—
- basketball-cards-2003-skybox-le92Latrell Sprewell[Artist Proof] #92未評級—Grade 9—PSA 10—
- basketball-cards-2003-skybox-le92Latrell Sprewell[Executive Proof] #92未評級—Grade 9—PSA 10—
- basketball-cards-2003-skybox-le92Latrell Sprewell[Gold Proof] #92未評級—Grade 9—PSA 10—
- basketball-cards-2003-skybox-le92Latrell Sprewell[Jersey Proof] #92未評級—Grade 9—PSA 10—
- basketball-cards-2003-skybox-le92Latrell Sprewell[Photographer Proof] #92未評級—Grade 9—PSA 10—
- basketball-cards-2003-skybox-le93Richard Jefferson[Executive Proof] #93未評級—Grade 9—PSA 10—
- basketball-cards-2003-skybox-le93Richard Jefferson[Gold Proof] #93未評級—Grade 9—PSA 10—
- basketball-cards-2003-skybox-le93Richard Jefferson[Jersey Proof] #93未評級—Grade 9—PSA 10—
- basketball-cards-2003-skybox-le93Richard Jefferson[Artist Proof] #93未評級—Grade 9—PSA 10—
- basketball-cards-2003-skybox-le93Richard Jefferson#93未評級—Grade 9—PSA 10—
- basketball-cards-2003-skybox-le93Richard Jefferson[Photographer Proof] #93未評級—Grade 9—PSA 10—
- basketball-cards-2003-skybox-le94Jamal Mashburn[Photographer Proof] #94未評級—Grade 9—PSA 10—
- basketball-cards-2003-skybox-le94Jamal Mashburn[Jersey Proof] #94未評級—Grade 9—PSA 10—
- basketball-cards-2003-skybox-le94Jamal Mashburn[Gold Proof] #94未評級—Grade 9—PSA 10—
- basketball-cards-2003-skybox-le94Jamal Mashburn[Artist Proof] #94未評級—Grade 9—PSA 10—
- basketball-cards-2003-skybox-le94Jamal Mashburn[Executive Proof] #94未評級—Grade 9—PSA 10—
- basketball-cards-2003-skybox-le94Jamal Mashburn#94未評級—Grade 9—PSA 10—
- basketball-cards-2003-skybox-le95Troy Murphy[Photographer Proof] #95未評級—Grade 9—PSA 10—
- basketball-cards-2003-skybox-le95Troy Murphy[Artist Proof] #95未評級—Grade 9—PSA 10—
- basketball-cards-2003-skybox-le95Troy Murphy[Executive Proof] #95未評級—Grade 9—PSA 10—
- basketball-cards-2003-skybox-le95Troy Murphy[Gold Proof] #95未評級—Grade 9—PSA 10—
- basketball-cards-2003-skybox-le95Troy Murphy[Jersey Proof] #95未評級—Grade 9—PSA 10—
- basketball-cards-2003-skybox-le96Peja Stojakovic[Jersey Proof] #96未評級—Grade 9—PSA 10—
- basketball-cards-2003-skybox-le96Peja Stojakovic[Executive Proof] #96未評級—Grade 9—PSA 10—
- basketball-cards-2003-skybox-le96Peja Stojakovic[Artist Proof] #96未評級—Grade 9—PSA 10—
- basketball-cards-2003-skybox-le96Peja Stojakovic#96未評級—Grade 9—PSA 10—
- basketball-cards-2003-skybox-le96Peja Stojakovic[Photographer Proof] #96未評級—Grade 9—PSA 10—
- basketball-cards-2003-skybox-le96Peja Stojakovic[Gold Proof] #96未評級—Grade 9—PSA 10—
- basketball-cards-2003-skybox-le97Allen Iverson[Executive Proof] #97未評級—Grade 9—PSA 10—
- basketball-cards-2003-skybox-le97Allen Iverson[Photographer Proof] #97未評級—Grade 9—PSA 10—
- basketball-cards-2003-skybox-le97Allen Iverson[Jersey Proof] #97未評級—Grade 9—PSA 10—
- basketball-cards-2003-skybox-le98Amare Stoudemire[Photographer Proof] #98未評級—Grade 9—PSA 10—
- basketball-cards-2003-skybox-le98Amare Stoudemire[Jersey Proof] #98未評級—Grade 9—PSA 10—
- basketball-cards-2003-skybox-le98Amare Stoudemire[Gold Proof] #98未評級—Grade 9—PSA 10—
- basketball-cards-2003-skybox-le98Amare Stoudemire[Executive Proof] #98未評級—Grade 9—PSA 10—
- basketball-cards-2003-skybox-le98Amare Stoudemire[Artist Proof] #98未評級—Grade 9—PSA 10—
- basketball-cards-2003-skybox-le99Rasho Nesterovic[Executive Proof] #99未評級—Grade 9—PSA 10—
- basketball-cards-2003-skybox-le99Rasho Nesterovic#99未評級—Grade 9—PSA 10—
- basketball-cards-2003-skybox-le99Rasho Nesterovic[Gold Proof] #99未評級—Grade 9—PSA 10—
- basketball-cards-2003-skybox-le99Rasho Nesterovic[Jersey Proof] #99未評級—Grade 9—PSA 10—
- basketball-cards-2003-skybox-le99Rasho Nesterovic[Photographer Proof] #99未評級—Grade 9—PSA 10—
- basketball-cards-2003-skybox-le99Rasho Nesterovic[Artist Proof] #99未評級—Grade 9—PSA 10—
- basketball-cards-2003-skybox-le100Bonzi Wells[Gold Proof] #100未評級—Grade 9—PSA 10—
- basketball-cards-2003-skybox-le100Bonzi Wells[Artist Proof] #100未評級—Grade 9—PSA 10—
- basketball-cards-2003-skybox-le100Bonzi Wells[Jersey Proof] #100未評級—Grade 9—PSA 10—
- basketball-cards-2003-skybox-le100Bonzi Wells[Photographer Proof] #100未評級—Grade 9—PSA 10—
- basketball-cards-2003-skybox-le100Bonzi Wells#100未評級—Grade 9—PSA 10—
- basketball-cards-2003-skybox-le100Bonzi Wells[Executive Proof] #100未評級—Grade 9—PSA 10—
- basketball-cards-2003-skybox-le101Bobby Jackson[Artist Proof] #101未評級—Grade 9—PSA 10—
- basketball-cards-2003-skybox-le101Bobby Jackson[Photographer Proof] #101未評級—Grade 9—PSA 10—
- basketball-cards-2003-skybox-le101Bobby Jackson[Jersey Proof] #101未評級—Grade 9—PSA 10—
- basketball-cards-2003-skybox-le101Bobby Jackson[Gold Proof] #101未評級—Grade 9—PSA 10—
- basketball-cards-2003-skybox-le101Bobby Jackson[Executive Proof] #101未評級—Grade 9—PSA 10—
- basketball-cards-2003-skybox-le102Anfernee Hardaway[Executive Proof] #102未評級—Grade 9—PSA 10—
- basketball-cards-2003-skybox-le102Anfernee Hardaway[Artist Proof] #102未評級—Grade 9—PSA 10—
- basketball-cards-2003-skybox-le102Anfernee Hardaway[Jersey Proof] #102未評級—Grade 9—PSA 10—
- basketball-cards-2003-skybox-le102Anfernee Hardaway[Photographer Proof] #102未評級—Grade 9—PSA 10—
- basketball-cards-2003-skybox-le103Larry Hughes#103未評級—Grade 9—PSA 10—
- basketball-cards-2003-skybox-le103Larry Hughes[Photographer Proof] #103未評級—Grade 9—PSA 10—
- basketball-cards-2003-skybox-le103Larry Hughes[Jersey Proof] #103未評級—Grade 9—PSA 10—
- basketball-cards-2003-skybox-le103Larry Hughes[Gold Proof] #103未評級—Grade 9—PSA 10—
- basketball-cards-2003-skybox-le103Larry Hughes[Executive Proof] #103未評級—Grade 9—PSA 10—
- basketball-cards-2003-skybox-le103Larry Hughes[Artist Proof] #103未評級—Grade 9—PSA 10—
- basketball-cards-2003-skybox-le104Shareef Abdur-Rahim[Jersey Proof] #104未評級—Grade 9—PSA 10—
- basketball-cards-2003-skybox-le104Shareef Abdur-Rahim[Gold Proof] #104未評級—Grade 9—PSA 10—
- basketball-cards-2003-skybox-le104Shareef Abdur-Rahim[Executive Proof] #104未評級—Grade 9—PSA 10—
- basketball-cards-2003-skybox-le104Shareef Abdur-Rahim[Artist Proof] #104未評級—Grade 9—PSA 10—
- basketball-cards-2003-skybox-le104Shareef Abdur-Rahim[Photographer Proof] #104未評級—Grade 9—PSA 10—
- basketball-cards-2003-skybox-le105Hedo Turkoglu[Photographer Proof] #105未評級—Grade 9—PSA 10—
- basketball-cards-2003-skybox-le105Hedo Turkoglu#105未評級—Grade 9—PSA 10—
- basketball-cards-2003-skybox-le105Hedo Turkoglu[Jersey Proof] #105未評級—Grade 9—PSA 10—
- basketball-cards-2003-skybox-le105Hedo Turkoglu[Artist Proof] #105未評級—Grade 9—PSA 10—
- basketball-cards-2003-skybox-le105Hedo Turkoglu[Executive Proof] #105未評級—Grade 9—PSA 10—
- basketball-cards-2003-skybox-le106Alvin Williams#106未評級—Grade 9—PSA 10—
- basketball-cards-2003-skybox-le106Alvin Williams[Photographer Proof] #106未評級—Grade 9—PSA 10—
- basketball-cards-2003-skybox-le106Alvin Williams[Jersey Proof] #106未評級—Grade 9—PSA 10—
- basketball-cards-2003-skybox-le106Alvin Williams[Artist Proof] #106未評級—Grade 9—PSA 10—
- basketball-cards-2003-skybox-le106Alvin Williams[Executive Proof] #106未評級—Grade 9—PSA 10—
- basketball-cards-2003-skybox-le106Alvin Williams[Gold Proof] #106未評級—Grade 9—PSA 10—
- basketball-cards-2003-skybox-le107Qyntel Woods[Executive Proof] #107未評級—Grade 9—PSA 10—
- basketball-cards-2003-skybox-le107Qyntel Woods[Photographer Proof] #107未評級—Grade 9—PSA 10—
- basketball-cards-2003-skybox-le107Qyntel Woods[Gold Proof] #107未評級—Grade 9—PSA 10—
- basketball-cards-2003-skybox-le107Qyntel Woods[Jersey Proof] #107未評級—Grade 9—PSA 10—
- basketball-cards-2003-skybox-le107Qyntel Woods#107未評級—Grade 9—PSA 10—
- basketball-cards-2003-skybox-le107Qyntel Woods[Artist Proof] #107未評級—Grade 9—PSA 10—
- basketball-cards-2003-skybox-le108Brad Miller[Jersey Proof] #108未評級—Grade 9—PSA 10—
- basketball-cards-2003-skybox-le108Brad Miller#108未評級—Grade 9—PSA 10—
- basketball-cards-2003-skybox-le108Brad Miller[Artist Proof] #108未評級—Grade 9—PSA 10—
- basketball-cards-2003-skybox-le108Brad Miller[Executive Proof] #108未評級—Grade 9—PSA 10—
- basketball-cards-2003-skybox-le108Brad Miller[Gold Proof] #108未評級—Grade 9—PSA 10—
- basketball-cards-2003-skybox-le108Brad Miller[Photographer Proof] #108未評級—Grade 9—PSA 10—
- basketball-cards-2003-skybox-le109Jalen Rose[Executive Proof] #109未評級—Grade 9—PSA 10—
- basketball-cards-2003-skybox-le109Jalen Rose[Artist Proof] #109未評級—Grade 9—PSA 10—
- basketball-cards-2003-skybox-le109Jalen Rose[Photographer Proof] #109未評級—Grade 9—PSA 10—
- basketball-cards-2003-skybox-le109Jalen Rose#109未評級—Grade 9—PSA 10—
- basketball-cards-2003-skybox-le109Jalen Rose[Jersey Proof] #109未評級—Grade 9—PSA 10—
- basketball-cards-2003-skybox-le110Antonio Davis[Jersey Proof] #110未評級—Grade 9—PSA 10—
- basketball-cards-2003-skybox-le110Antonio Davis[Photographer Proof] #110未評級—Grade 9—PSA 10—
- basketball-cards-2003-skybox-le110Antonio Davis[Executive Proof] #110未評級—Grade 9—PSA 10—
- basketball-cards-2003-skybox-le110Antonio Davis[Artist Proof] #110未評級—Grade 9—PSA 10—
- basketball-cards-2003-skybox-le110Antonio Davis[Gold Proof] #110未評級—Grade 9—PSA 10—
- basketball-cards-2003-skybox-le111David West[Artist Proof] #111未評級—Grade 9—PSA 10—
- basketball-cards-2003-skybox-le111David West#111未評級—Grade 9—PSA 10—
- basketball-cards-2003-skybox-le111David West[Executive Proof] #111未評級—Grade 9—PSA 10—
- basketball-cards-2003-skybox-le111David West[Gold Proof] #111未評級—Grade 9—PSA 10—
- basketball-cards-2003-skybox-le111David West[Jersey Proof] #111未評級—Grade 9—PSA 10—
- basketball-cards-2003-skybox-le111David West[Photographer Proof] #111未評級—Grade 9—PSA 10—
- basketball-cards-2003-skybox-le112Boris Diaw[Photographer Proof] #112未評級—Grade 9—PSA 10—
- basketball-cards-2003-skybox-le112Boris Diaw#112未評級—Grade 9—PSA 10—
- basketball-cards-2003-skybox-le112Boris Diaw[Jersey Proof] #112未評級—Grade 9—PSA 10—
- basketball-cards-2003-skybox-le112Boris Diaw[Gold Proof] #112未評級—Grade 9—PSA 10—
- basketball-cards-2003-skybox-le112Boris Diaw[Executive Proof] #112未評級—Grade 9—PSA 10—
- basketball-cards-2003-skybox-le112Boris Diaw[Artist Proof] #112未評級—Grade 9—PSA 10—
- basketball-cards-2003-skybox-le113Travis Hansen[Executive Proof] #113未評級—Grade 9—PSA 10—
- basketball-cards-2003-skybox-le113Travis Hansen[Photographer Proof] #113未評級—Grade 9—PSA 10—
- basketball-cards-2003-skybox-le113Travis Hansen[Gold Proof] #113未評級—Grade 9—PSA 10—
- basketball-cards-2003-skybox-le113Travis Hansen[Jersey Proof] #113未評級—Grade 9—PSA 10—
- basketball-cards-2003-skybox-le113Travis Hansen#113未評級—Grade 9—PSA 10—
- basketball-cards-2003-skybox-le113Travis Hansen[Artist Proof] #113未評級—Grade 9—PSA 10—
- basketball-cards-2003-skybox-le114Marcus Banks[Executive Proof] #114未評級—Grade 9—PSA 10—
- basketball-cards-2003-skybox-le114Marcus Banks[Artist Proof] #114未評級—Grade 9—PSA 10—
- basketball-cards-2003-skybox-le114Marcus Banks#114未評級—Grade 9—PSA 10—
- basketball-cards-2003-skybox-le114Marcus Banks[Photographer Proof] #114未評級—Grade 9—PSA 10—
- basketball-cards-2003-skybox-le114Marcus Banks[Jersey Proof] #114未評級—Grade 9—PSA 10—
- basketball-cards-2003-skybox-le114Marcus Banks[Gold Proof] #114未評級—Grade 9—PSA 10—
- basketball-cards-2003-skybox-le115Kendrick Perkins[Jersey Proof] #115未評級—Grade 9—PSA 10—
- basketball-cards-2003-skybox-le115Kendrick Perkins[Executive Proof] #115未評級—Grade 9—PSA 10—
- basketball-cards-2003-skybox-le115Kendrick Perkins[Artist Proof] #115未評級—Grade 9—PSA 10—
- basketball-cards-2003-skybox-le115Kendrick Perkins[Photographer Proof] #115未評級—Grade 9—PSA 10—
- basketball-cards-2003-skybox-le115Kendrick Perkins[Gold Proof] #115未評級—Grade 9—PSA 10—
- basketball-cards-2003-skybox-le116Darius Songaila[Jersey Proof] #116未評級—Grade 9—PSA 10—
- basketball-cards-2003-skybox-le116Darius Songaila#116未評級—Grade 9—PSA 10—
- basketball-cards-2003-skybox-le116Darius Songaila[Artist Proof] #116未評級—Grade 9—PSA 10—
- basketball-cards-2003-skybox-le116Darius Songaila[Executive Proof] #116未評級—Grade 9—PSA 10—
- basketball-cards-2003-skybox-le116Darius Songaila[Gold Proof] #116未評級—Grade 9—PSA 10—
- basketball-cards-2003-skybox-le116Darius Songaila[Photographer Proof] #116未評級—Grade 9—PSA 10—
- basketball-cards-2003-skybox-le117Kirk Hinrich#117未評級—Grade 9—PSA 10—
- basketball-cards-2003-skybox-le117Kirk Hinrich[Artist Proof] #117未評級—Grade 9—PSA 10—
- basketball-cards-2003-skybox-le117Kirk Hinrich[Photographer Proof] #117未評級—Grade 9—PSA 10—
- basketball-cards-2003-skybox-le117Kirk Hinrich[Executive Proof] #117未評級—Grade 9—PSA 10—
- basketball-cards-2003-skybox-le117Kirk Hinrich[Gold Proof] #117未評級—Grade 9—PSA 10—
- basketball-cards-2003-skybox-le117Kirk Hinrich[Jersey Proof] #117未評級—Grade 9—PSA 10—
- basketball-cards-2003-skybox-le118LeBron James[Photographer Proof] #118未評級—Grade 9—PSA 10—
- basketball-cards-2003-skybox-le118LeBron James[Artist Proof] #118未評級—Grade 9—PSA 10—
- basketball-cards-2003-skybox-le118LeBron James[Executive Proof] #118未評級—Grade 9—PSA 10—
- basketball-cards-2003-skybox-le118LeBron James[Jersey Proof] #118未評級—Grade 9—PSA 10—
- basketball-cards-2003-skybox-le119Jason Kapono[Executive Proof] #119未評級—Grade 9—PSA 10—
- basketball-cards-2003-skybox-le119Jason Kapono[Artist Proof] #119未評級—Grade 9—PSA 10—
- basketball-cards-2003-skybox-le119Jason Kapono#119未評級—Grade 9—PSA 10—
- basketball-cards-2003-skybox-le119Jason Kapono[Gold Proof] #119未評級—Grade 9—PSA 10—
- basketball-cards-2003-skybox-le119Jason Kapono[Jersey Proof] #119未評級—Grade 9—PSA 10—
- basketball-cards-2003-skybox-le119Jason Kapono[Photographer Proof] #119未評級—Grade 9—PSA 10—
- basketball-cards-2003-skybox-le120Josh Howard[Photographer Proof] #120未評級—Grade 9—PSA 10—
- basketball-cards-2003-skybox-le120Josh Howard[Executive Proof] #120未評級—Grade 9—PSA 10—
- basketball-cards-2003-skybox-le120Josh Howard[Artist Proof] #120未評級—Grade 9—PSA 10—
- basketball-cards-2003-skybox-le120Josh Howard#120未評級—Grade 9—PSA 10—
- basketball-cards-2003-skybox-le120Josh Howard[Gold Proof] #120未評級—Grade 9—PSA 10—
- basketball-cards-2003-skybox-le120Josh Howard[Jersey Proof] #120未評級—Grade 9—PSA 10—
- basketball-cards-2003-skybox-le121Marquis Daniels[Gold Proof] #121未評級—Grade 9—PSA 10—
- basketball-cards-2003-skybox-le121Marquis Daniels#121未評級—Grade 9—PSA 10—
- basketball-cards-2003-skybox-le121Marquis Daniels[Jersey Proof] #121未評級—Grade 9—PSA 10—
- basketball-cards-2003-skybox-le121Marquis Daniels[Artist Proof] #121未評級—Grade 9—PSA 10—
- basketball-cards-2003-skybox-le121Marquis Daniels[Photographer Proof] #121未評級—Grade 9—PSA 10—
- basketball-cards-2003-skybox-le121Marquis Daniels[Executive Proof] #121未評級—Grade 9—PSA 10—
- basketball-cards-2003-skybox-le122Carmelo Anthony[Jersey Proof] #122未評級—Grade 9—PSA 10—
- basketball-cards-2003-skybox-le122Carmelo Anthony[Executive Proof] #122未評級—Grade 9—PSA 10—
- basketball-cards-2003-skybox-le122Carmelo Anthony[Artist Proof] #122未評級—Grade 9—PSA 10—
- basketball-cards-2003-skybox-le123Darko Milicic[Jersey Proof] #123未評級—Grade 9—PSA 10—
- basketball-cards-2003-skybox-le123Darko Milicic[Photographer Proof] #123未評級—Grade 9—PSA 10—
- basketball-cards-2003-skybox-le123Darko Milicic[Gold Proof] #123未評級—Grade 9—PSA 10—
- basketball-cards-2003-skybox-le123Darko Milicic[Executive Proof] #123未評級—Grade 9—PSA 10—
- basketball-cards-2003-skybox-le123Darko Milicic[Artist Proof] #123未評級—Grade 9—PSA 10—
- basketball-cards-2003-skybox-le123Darko Milicic#123未評級—Grade 9—PSA 10—
- basketball-cards-2003-skybox-le124Zaza Pachulia[Executive Proof] #124未評級—Grade 9—PSA 10—
- basketball-cards-2003-skybox-le124Zaza Pachulia[Artist Proof] #124未評級—Grade 9—PSA 10—
- basketball-cards-2003-skybox-le124Zaza Pachulia#124未評級—Grade 9—PSA 10—
- basketball-cards-2003-skybox-le124Zaza Pachulia[Jersey Proof] #124未評級—Grade 9—PSA 10—
- basketball-cards-2003-skybox-le124Zaza Pachulia[Gold Proof] #124未評級—Grade 9—PSA 10—
- basketball-cards-2003-skybox-le124Zaza Pachulia[Photographer Proof] #124未評級—Grade 9—PSA 10—
- basketball-cards-2003-skybox-le125Mickael Pietrus[Photographer Proof] #125未評級—Grade 9—PSA 10—
- basketball-cards-2003-skybox-le125Mickael Pietrus[Jersey Proof] #125未評級—Grade 9—PSA 10—
- basketball-cards-2003-skybox-le125Mickael Pietrus[Gold Proof] #125未評級—Grade 9—PSA 10—
- basketball-cards-2003-skybox-le125Mickael Pietrus[Executive Proof] #125未評級—Grade 9—PSA 10—
- basketball-cards-2003-skybox-le125Mickael Pietrus#125未評級—Grade 9—PSA 10—
- basketball-cards-2003-skybox-le125Mickael Pietrus[Artist Proof] #125未評級—Grade 9—PSA 10—
- basketball-cards-2003-skybox-le126Ben Handlogten[Photographer Proof] #126未評級—Grade 9—PSA 10—
- basketball-cards-2003-skybox-le126Ben Handlogten[Jersey Proof] #126未評級—Grade 9—PSA 10—
- basketball-cards-2003-skybox-le126Ben Handlogten[Gold Proof] #126未評級—Grade 9—PSA 10—
- basketball-cards-2003-skybox-le126Ben Handlogten[Executive Proof] #126未評級—Grade 9—PSA 10—
- basketball-cards-2003-skybox-le126Ben Handlogten[Artist Proof] #126未評級—Grade 9—PSA 10—
- basketball-cards-2003-skybox-le126Ben Handlogten#126未評級—Grade 9—PSA 10—
- basketball-cards-2003-skybox-le127James Jones[Jersey Proof] #127未評級—Grade 9—PSA 10—
- basketball-cards-2003-skybox-le127James Jones#127未評級—Grade 9—PSA 10—
- basketball-cards-2003-skybox-le127James Jones[Artist Proof] #127未評級—Grade 9—PSA 10—
- basketball-cards-2003-skybox-le127James Jones[Executive Proof] #127未評級—Grade 9—PSA 10—
- basketball-cards-2003-skybox-le127James Jones[Gold Proof] #127未評級—Grade 9—PSA 10—
- basketball-cards-2003-skybox-le127James Jones[Photographer Proof] #127未評級—Grade 9—PSA 10—
- basketball-cards-2003-skybox-le128Chris Kaman[Photographer Proof] #128未評級—Grade 9—PSA 10—
- basketball-cards-2003-skybox-le128Chris Kaman[Jersey Proof] #128未評級—Grade 9—PSA 10—
- basketball-cards-2003-skybox-le128Chris Kaman[Artist Proof] #128未評級—Grade 9—PSA 10—
- basketball-cards-2003-skybox-le128Chris Kaman[Executive Proof] #128未評級—Grade 9—PSA 10—
- basketball-cards-2003-skybox-le128Chris Kaman[Gold Proof] #128未評級—Grade 9—PSA 10—
- basketball-cards-2003-skybox-le128Chris Kaman#128未評級—Grade 9—PSA 10—
- basketball-cards-2003-skybox-le129Josh Moore[Gold Proof] #129未評級—Grade 9—PSA 10—
- basketball-cards-2003-skybox-le129Josh Moore[Executive Proof] #129未評級—Grade 9—PSA 10—
- basketball-cards-2003-skybox-le129Josh Moore[Artist Proof] #129未評級—Grade 9—PSA 10—
- basketball-cards-2003-skybox-le129Josh Moore#129未評級—Grade 9—PSA 10—
- basketball-cards-2003-skybox-le129Josh Moore[Photographer Proof] #129未評級—Grade 9—PSA 10—
- basketball-cards-2003-skybox-le129Josh Moore[Jersey Proof] #129未評級—Grade 9—PSA 10—
- basketball-cards-2003-skybox-le130Brian Cook[Gold Proof] #130未評級—Grade 9—PSA 10—
- basketball-cards-2003-skybox-le130Brian Cook#130未評級—Grade 9—PSA 10—
- basketball-cards-2003-skybox-le130Brian Cook[Artist Proof] #130未評級—Grade 9—PSA 10—
- basketball-cards-2003-skybox-le130Brian Cook[Executive Proof] #130未評級—Grade 9—PSA 10—
- basketball-cards-2003-skybox-le130Brian Cook[Jersey Proof] #130未評級—Grade 9—PSA 10—
- basketball-cards-2003-skybox-le130Brian Cook[Photographer Proof] #130未評級—Grade 9—PSA 10—
- basketball-cards-2003-skybox-le131Luke Walton#131未評級—Grade 9—PSA 10—
- basketball-cards-2003-skybox-le131Luke Walton[Jersey Proof] #131未評級—Grade 9—PSA 10—
- basketball-cards-2003-skybox-le131Luke Walton[Gold Proof] #131未評級—Grade 9—PSA 10—
- basketball-cards-2003-skybox-le131Luke Walton[Executive Proof] #131未評級—Grade 9—PSA 10—
- basketball-cards-2003-skybox-le131Luke Walton[Artist Proof] #131未評級—Grade 9—PSA 10—
- basketball-cards-2003-skybox-le131Luke Walton[Photographer Proof] #131未評級—Grade 9—PSA 10—
- basketball-cards-2003-skybox-le132Troy Bell#132未評級—Grade 9—PSA 10—
- basketball-cards-2003-skybox-le132Troy Bell[Photographer Proof] #132未評級—Grade 9—PSA 10—
- basketball-cards-2003-skybox-le132Troy Bell[Jersey Proof] #132未評級—Grade 9—PSA 10—
- basketball-cards-2003-skybox-le132Troy Bell[Gold Proof] #132未評級—Grade 9—PSA 10—
- basketball-cards-2003-skybox-le132Troy Bell[Executive Proof] #132未評級—Grade 9—PSA 10—
- basketball-cards-2003-skybox-le132Troy Bell[Artist Proof] #132未評級—Grade 9—PSA 10—
- basketball-cards-2003-skybox-le133Dahntay Jones[Artist Proof] #133未評級—Grade 9—PSA 10—
- basketball-cards-2003-skybox-le133Dahntay Jones[Photographer Proof] #133未評級—Grade 9—PSA 10—
- basketball-cards-2003-skybox-le133Dahntay Jones[Jersey Proof] #133未評級—Grade 9—PSA 10—
- basketball-cards-2003-skybox-le133Dahntay Jones[Gold Proof] #133未評級—Grade 9—PSA 10—
- basketball-cards-2003-skybox-le133Dahntay Jones[Executive Proof] #133未評級—Grade 9—PSA 10—
- basketball-cards-2003-skybox-le133Dahntay Jones#133未評級—Grade 9—PSA 10—
- basketball-cards-2003-skybox-le134Dwyane Wade[Photographer Proof] #134未評級—Grade 9—PSA 10—
- basketball-cards-2003-skybox-le134Dwyane Wade#134未評級—Grade 9—PSA 10—
- basketball-cards-2003-skybox-le134Dwyane Wade[Artist Proof] #134未評級—Grade 9—PSA 10—
- basketball-cards-2003-skybox-le134Dwyane Wade[Executive Proof] #134未評級—Grade 9—PSA 10—
- basketball-cards-2003-skybox-le134Dwyane Wade[Gold Proof] #134未評級—Grade 9—PSA 10—
- basketball-cards-2003-skybox-le134Dwyane Wade[Jersey Proof] #134未評級—Grade 9—PSA 10—
- basketball-cards-2003-skybox-le135Udonis Haslem#135未評級—Grade 9—PSA 10—
- basketball-cards-2003-skybox-le135Udonis Haslem[Photographer Proof] #135未評級—Grade 9—PSA 10—
- basketball-cards-2003-skybox-le135Udonis Haslem[Jersey Proof] #135未評級—Grade 9—PSA 10—
- basketball-cards-2003-skybox-le135Udonis Haslem[Gold Proof] #135未評級—Grade 9—PSA 10—
- basketball-cards-2003-skybox-le135Udonis Haslem[Executive Proof] #135未評級—Grade 9—PSA 10—
- basketball-cards-2003-skybox-le135Udonis Haslem[Artist Proof] #135未評級—Grade 9—PSA 10—
- basketball-cards-2003-skybox-le136T.J. Ford#136未評級—Grade 9—PSA 10—
- basketball-cards-2003-skybox-le136T.J. Ford[Artist Proof] #136未評級—Grade 9—PSA 10—
- basketball-cards-2003-skybox-le136T.J. Ford[Executive Proof] #136未評級—Grade 9—PSA 10—
- basketball-cards-2003-skybox-le136T.J. Ford[Gold Proof] #136未評級—Grade 9—PSA 10—
- basketball-cards-2003-skybox-le136T.J. Ford[Jersey Proof] #136未評級—Grade 9—PSA 10—
- basketball-cards-2003-skybox-le136T.J. Ford[Photographer Proof] #136未評級—Grade 9—PSA 10—
- basketball-cards-2003-skybox-le137Ndudi Ebi[Jersey Proof] #137未評級—Grade 9—PSA 10—
- basketball-cards-2003-skybox-le137Ndudi Ebi[Photographer Proof] #137未評級—Grade 9—PSA 10—
- basketball-cards-2003-skybox-le137Ndudi Ebi[Artist Proof] #137未評級—Grade 9—PSA 10—
- basketball-cards-2003-skybox-le137Ndudi Ebi#137未評級—Grade 9—PSA 10—
- basketball-cards-2003-skybox-le137Ndudi Ebi[Executive Proof] #137未評級—Grade 9—PSA 10—
- basketball-cards-2003-skybox-le137Ndudi Ebi[Rarified Rookies Die Cut] #137未評級—Grade 9—PSA 10—
- basketball-cards-2003-skybox-le137Ndudi Ebi[Gold Proof] #137未評級—Grade 9—PSA 10—
- basketball-cards-2003-skybox-le138Zoran Planinic[Photographer Proof] #138未評級—Grade 9—PSA 10—
- basketball-cards-2003-skybox-le138Zoran Planinic[Executive Proof] #138未評級—Grade 9—PSA 10—
- basketball-cards-2003-skybox-le138Zoran Planinic[Artist Proof] #138未評級—Grade 9—PSA 10—
- basketball-cards-2003-skybox-le138Zoran Planinic#138未評級—Grade 9—PSA 10—
- basketball-cards-2003-skybox-le138Zoran Planinic[Gold Proof] #138未評級—Grade 9—PSA 10—
- basketball-cards-2003-skybox-le138Zoran Planinic[Jersey Proof] #138未評級—Grade 9—PSA 10—
- basketball-cards-2003-skybox-le139Raul Lopez[Executive Proof] #139未評級—Grade 9—PSA 10—
- basketball-cards-2003-skybox-le139Raul Lopez[Gold Proof] #139未評級—Grade 9—PSA 10—
- basketball-cards-2003-skybox-le139Raul Lopez[Jersey Proof] #139未評級—Grade 9—PSA 10—
- basketball-cards-2003-skybox-le139Raul Lopez[Photographer Proof] #139未評級—Grade 9—PSA 10—
- basketball-cards-2003-skybox-le139Raul Lopez#139未評級—Grade 9—PSA 10—
- basketball-cards-2003-skybox-le139Raul Lopez[Artist Proof] #139未評級—Grade 9—PSA 10—
- basketball-cards-2003-skybox-le140Francisco Elson[Artist Proof] #140未評級—Grade 9—PSA 10—
- basketball-cards-2003-skybox-le140Francisco Elson#140未評級—Grade 9—PSA 10—
- basketball-cards-2003-skybox-le140Francisco Elson[Photographer Proof] #140未評級—Grade 9—PSA 10—
- basketball-cards-2003-skybox-le140Francisco Elson[Jersey Proof] #140未評級—Grade 9—PSA 10—
- basketball-cards-2003-skybox-le140Francisco Elson[Gold Proof] #140未評級—Grade 9—PSA 10—
- basketball-cards-2003-skybox-le140Francisco Elson[Executive Proof] #140未評級—Grade 9—PSA 10—
- basketball-cards-2003-skybox-le141Mike Sweetney[Executive Proof] #141未評級—Grade 9—PSA 10—
- basketball-cards-2003-skybox-le141Mike Sweetney#141未評級—Grade 9—PSA 10—
- basketball-cards-2003-skybox-le141Mike Sweetney[Artist Proof] #141未評級—Grade 9—PSA 10—
- basketball-cards-2003-skybox-le141Mike Sweetney[Gold Proof] #141未評級—Grade 9—PSA 10—
- basketball-cards-2003-skybox-le141Mike Sweetney[Jersey Proof] #141未評級—Grade 9—PSA 10—
- basketball-cards-2003-skybox-le141Mike Sweetney[Photographer Proof] #141未評級—Grade 9—PSA 10—
- basketball-cards-2003-skybox-le142Maciej Lampe#142未評級—Grade 9—PSA 10—
- basketball-cards-2003-skybox-le142Maciej Lampe[Artist Proof] #142未評級—Grade 9—PSA 10—
- basketball-cards-2003-skybox-le142Maciej Lampe[Executive Proof] #142未評級—Grade 9—PSA 10—
- basketball-cards-2003-skybox-le142Maciej Lampe[Photographer Proof] #142未評級—Grade 9—PSA 10—
- basketball-cards-2003-skybox-le142Maciej Lampe[Gold Proof] #142未評級—Grade 9—PSA 10—
- basketball-cards-2003-skybox-le142Maciej Lampe[Jersey Proof] #142未評級—Grade 9—PSA 10—
- basketball-cards-2003-skybox-le143Slavko Vranes[Artist Proof] #143未評級—Grade 9—PSA 10—
- basketball-cards-2003-skybox-le143Slavko Vranes[Photographer Proof] #143未評級—Grade 9—PSA 10—
- basketball-cards-2003-skybox-le143Slavko Vranes[Gold Proof] #143未評級—Grade 9—PSA 10—
- basketball-cards-2003-skybox-le143Slavko Vranes[Jersey Proof] #143未評級—Grade 9—PSA 10—
- basketball-cards-2003-skybox-le143Slavko Vranes[Executive Proof] #143未評級—Grade 9—PSA 10—
- basketball-cards-2003-skybox-le144Keith Bogans[Jersey Proof] #144未評級—Grade 9—PSA 10—
- basketball-cards-2003-skybox-le144Keith Bogans[Gold Proof] #144未評級—Grade 9—PSA 10—
- basketball-cards-2003-skybox-le144Keith Bogans#144未評級—Grade 9—PSA 10—
- basketball-cards-2003-skybox-le144Keith Bogans[Artist Proof] #144未評級—Grade 9—PSA 10—
- basketball-cards-2003-skybox-le144Keith Bogans[Executive Proof] #144未評級—Grade 9—PSA 10—
- basketball-cards-2003-skybox-le144Keith Bogans[Photographer Proof] #144未評級—Grade 9—PSA 10—
- basketball-cards-2003-skybox-le145Reece Gaines#145未評級—Grade 9—PSA 10—
- basketball-cards-2003-skybox-le145Reece Gaines[Gold Proof] #145未評級—Grade 9—PSA 10—
- basketball-cards-2003-skybox-le145Reece Gaines[Photographer Proof] #145未評級—Grade 9—PSA 10—
- basketball-cards-2003-skybox-le145Reece Gaines[Jersey Proof] #145未評級—Grade 9—PSA 10—
- basketball-cards-2003-skybox-le145Reece Gaines[Executive Proof] #145未評級—Grade 9—PSA 10—
- basketball-cards-2003-skybox-le145Reece Gaines[Artist Proof] #145未評級—Grade 9—PSA 10—
- basketball-cards-2003-skybox-le146Willie Green#146未評級—Grade 9—PSA 10—
- basketball-cards-2003-skybox-le146Willie Green[Photographer Proof] #146未評級—Grade 9—PSA 10—
- basketball-cards-2003-skybox-le146Willie Green[Jersey Proof] #146未評級—Grade 9—PSA 10—
- basketball-cards-2003-skybox-le146Willie Green[Gold Proof] #146未評級—Grade 9—PSA 10—
- basketball-cards-2003-skybox-le146Willie Green[Executive Proof] #146未評級—Grade 9—PSA 10—
- basketball-cards-2003-skybox-le146Willie Green[Artist Proof] #146未評級—Grade 9—PSA 10—
- basketball-cards-2003-skybox-le147Kyle Korver[Photographer Proof] #147未評級—Grade 9—PSA 10—
- basketball-cards-2003-skybox-le147Kyle Korver#147未評級—Grade 9—PSA 10—
- basketball-cards-2003-skybox-le147Kyle Korver[Artist Proof] #147未評級—Grade 9—PSA 10—
- basketball-cards-2003-skybox-le147Kyle Korver[Executive Proof] #147未評級—Grade 9—PSA 10—
- basketball-cards-2003-skybox-le147Kyle Korver[Gold Proof] #147未評級—Grade 9—PSA 10—
- basketball-cards-2003-skybox-le147Kyle Korver[Jersey Proof] #147未評級—Grade 9—PSA 10—
- basketball-cards-2003-skybox-le148Zarko Cabarkapa[Artist Proof] #148未評級—Grade 9—PSA 10—
- basketball-cards-2003-skybox-le148Zarko Cabarkapa[Photographer Proof] #148未評級—Grade 9—PSA 10—
- basketball-cards-2003-skybox-le148Zarko Cabarkapa[Jersey Proof] #148未評級—Grade 9—PSA 10—
- basketball-cards-2003-skybox-le148Zarko Cabarkapa[Gold Proof] #148未評級—Grade 9—PSA 10—
- basketball-cards-2003-skybox-le148Zarko Cabarkapa[Executive Proof] #148未評級—Grade 9—PSA 10—
- basketball-cards-2003-skybox-le148Zarko Cabarkapa#148未評級—Grade 9—PSA 10—
- basketball-cards-2003-skybox-le149Leandro Barbosa[Gold Proof] #149未評級—Grade 9—PSA 10—
- basketball-cards-2003-skybox-le149Leandro Barbosa[Photographer Proof] #149未評級—Grade 9—PSA 10—
- basketball-cards-2003-skybox-le149Leandro Barbosa[Jersey Proof] #149未評級—Grade 9—PSA 10—
- basketball-cards-2003-skybox-le149Leandro Barbosa[Executive Proof] #149未評級—Grade 9—PSA 10—
- basketball-cards-2003-skybox-le149Leandro Barbosa[Artist Proof] #149未評級—Grade 9—PSA 10—
- basketball-cards-2003-skybox-le149Leandro Barbosa#149未評級—Grade 9—PSA 10—
- basketball-cards-2003-skybox-le150Travis Outlaw[Jersey Proof] #150未評級—Grade 9—PSA 10—
- basketball-cards-2003-skybox-le150Travis Outlaw[Gold Proof] #150未評級—Grade 9—PSA 10—
- basketball-cards-2003-skybox-le150Travis Outlaw#150未評級—Grade 9—PSA 10—
- basketball-cards-2003-skybox-le150Travis Outlaw[Artist Proof] #150未評級—Grade 9—PSA 10—
- basketball-cards-2003-skybox-le150Travis Outlaw[Executive Proof] #150未評級—Grade 9—PSA 10—
- basketball-cards-2003-skybox-le150Travis Outlaw[Photographer Proof] #150未評級—Grade 9—PSA 10—
- basketball-cards-2003-skybox-le151Curtis Borchardt[Executive Proof] #151未評級—Grade 9—PSA 10—
- basketball-cards-2003-skybox-le151Curtis Borchardt[Artist Proof] #151未評級—Grade 9—PSA 10—
- basketball-cards-2003-skybox-le151Curtis Borchardt[Gold Proof] #151未評級—Grade 9—PSA 10—
- basketball-cards-2003-skybox-le151Curtis Borchardt#151未評級—Grade 9—PSA 10—
- basketball-cards-2003-skybox-le151Curtis Borchardt[Jersey Proof] #151未評級—Grade 9—PSA 10—
- basketball-cards-2003-skybox-le151Curtis Borchardt[Photographer Proof] #151未評級—Grade 9—PSA 10—
- basketball-cards-2003-skybox-le152Alex Garcia[Executive Proof] #152未評級—Grade 9—PSA 10—
- basketball-cards-2003-skybox-le152Alex Garcia#152未評級—Grade 9—PSA 10—
- basketball-cards-2003-skybox-le152Alex Garcia[Photographer Proof] #152未評級—Grade 9—PSA 10—
- basketball-cards-2003-skybox-le152Alex Garcia[Jersey Proof] #152未評級—Grade 9—PSA 10—
- basketball-cards-2003-skybox-le152Alex Garcia[Gold Proof] #152未評級—Grade 9—PSA 10—
- basketball-cards-2003-skybox-le152Alex Garcia[Artist Proof] #152未評級—Grade 9—PSA 10—
- basketball-cards-2003-skybox-le153Richie Frahm[Jersey Proof] #153未評級—Grade 9—PSA 10—
- basketball-cards-2003-skybox-le153Richie Frahm[Gold Proof] #153未評級—Grade 9—PSA 10—
- basketball-cards-2003-skybox-le153Richie Frahm[Executive Proof] #153未評級—Grade 9—PSA 10—
- basketball-cards-2003-skybox-le153Richie Frahm#153未評級—Grade 9—PSA 10—
- basketball-cards-2003-skybox-le153Richie Frahm[Artist Proof] #153未評級—Grade 9—PSA 10—
- basketball-cards-2003-skybox-le153Richie Frahm[Photographer Proof] #153未評級—Grade 9—PSA 10—
- basketball-cards-2003-skybox-le154Nick Collison[Artist Proof] #154未評級—Grade 9—PSA 10—
- basketball-cards-2003-skybox-le154Nick Collison#154未評級—Grade 9—PSA 10—
- basketball-cards-2003-skybox-le154Nick Collison[Photographer Proof] #154未評級—Grade 9—PSA 10—
- basketball-cards-2003-skybox-le154Nick Collison[Jersey Proof] #154未評級—Grade 9—PSA 10—
- basketball-cards-2003-skybox-le154Nick Collison[Executive Proof] #154未評級—Grade 9—PSA 10—
- basketball-cards-2003-skybox-le155Luke Ridnour[Jersey Proof] #155未評級—Grade 9—PSA 10—
- basketball-cards-2003-skybox-le155Luke Ridnour[Executive Proof] #155未評級—Grade 9—PSA 10—
- basketball-cards-2003-skybox-le155Luke Ridnour[Artist Proof] #155未評級—Grade 9—PSA 10—
- basketball-cards-2003-skybox-le155Luke Ridnour[Photographer Proof] #155未評級—Grade 9—PSA 10—
- basketball-cards-2003-skybox-le155Luke Ridnour[Gold Proof] #155未評級—Grade 9—PSA 10—
- basketball-cards-2003-skybox-le156Chris Bosh[Gold Proof] #156未評級—Grade 9—PSA 10—
- basketball-cards-2003-skybox-le156Chris Bosh[Artist Proof] #156未評級—Grade 9—PSA 10—
- basketball-cards-2003-skybox-le156Chris Bosh[Executive Proof] #156未評級—Grade 9—PSA 10—
- basketball-cards-2003-skybox-le156Chris Bosh[Jersey Proof] #156未評級—Grade 9—PSA 10—
- basketball-cards-2003-skybox-le156Chris Bosh[Photographer Proof] #156未評級—Grade 9—PSA 10—
- basketball-cards-2003-skybox-le157Aleksandar Pavlovic[Executive Proof] #157未評級—Grade 9—PSA 10—
- basketball-cards-2003-skybox-le157Aleksandar Pavlovic[Gold Proof] #157未評級—Grade 9—PSA 10—
- basketball-cards-2003-skybox-le157Aleksandar Pavlovic[Jersey Proof] #157未評級—Grade 9—PSA 10—
- basketball-cards-2003-skybox-le157Aleksandar Pavlovic[Photographer Proof] #157未評級—Grade 9—PSA 10—
- basketball-cards-2003-skybox-le157Aleksandar Pavlovic[Artist Proof] #157未評級—Grade 9—PSA 10—
- basketball-cards-2003-skybox-le158Maurice Williams[Jersey Proof] #158未評級—Grade 9—PSA 10—
- basketball-cards-2003-skybox-le158Maurice Williams#158未評級—Grade 9—PSA 10—
- basketball-cards-2003-skybox-le158Maurice Williams[Artist Proof] #158未評級—Grade 9—PSA 10—
- basketball-cards-2003-skybox-le158Maurice Williams[Photographer Proof] #158未評級—Grade 9—PSA 10—
- basketball-cards-2003-skybox-le158Maurice Williams[Gold Proof] #158未評級—Grade 9—PSA 10—
- basketball-cards-2003-skybox-le158Maurice Williams[Executive Proof] #158未評級—Grade 9—PSA 10—
- basketball-cards-2003-skybox-le159Jarvis Hayes[Photographer Proof] #159未評級—Grade 9—PSA 10—
- basketball-cards-2003-skybox-le159Jarvis Hayes[Artist Proof] #159未評級—Grade 9—PSA 10—
- basketball-cards-2003-skybox-le159Jarvis Hayes[Executive Proof] #159未評級—Grade 9—PSA 10—
- basketball-cards-2003-skybox-le159Jarvis Hayes[Gold Proof] #159未評級—Grade 9—PSA 10—
- basketball-cards-2003-skybox-le159Jarvis Hayes[Jersey Proof] #159未評級—Grade 9—PSA 10—
- basketball-cards-2003-skybox-le159Jarvis Hayes#159未評級—Grade 9—PSA 10—
- basketball-cards-2003-skybox-le160Steve Blake[Photographer Proof] #160未評級—Grade 9—PSA 10—
- basketball-cards-2003-skybox-le160Steve Blake[Executive Proof] #160未評級—Grade 9—PSA 10—
- basketball-cards-2003-skybox-le160Steve Blake[Jersey Proof] #160未評級—Grade 9—PSA 10—
- basketball-cards-2003-skybox-le160Steve Blake[Gold Proof] #160未評級—Grade 9—PSA 10—
- basketball-cards-2003-skybox-le160Steve Blake#160未評級—Grade 9—PSA 10—
- basketball-cards-2003-skybox-le160Steve Blake[Artist Proof] #160未評級—Grade 9—PSA 10—